|
|
|
|

New
Improved Magic Bean Bag
- Step By Step Instructions -
|
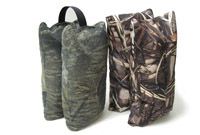 |
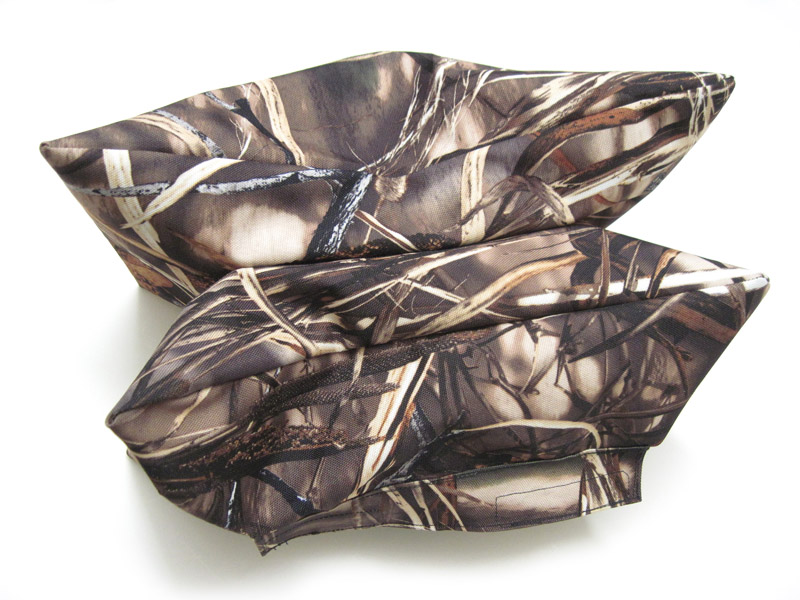
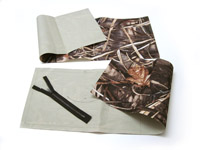
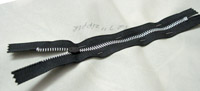
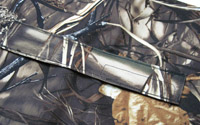
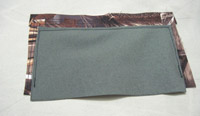
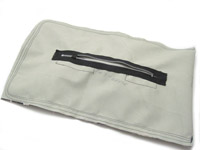
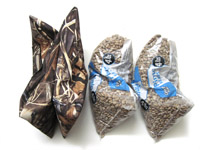
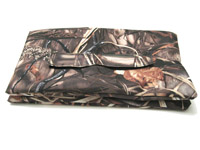
Left: My original medium bean
bag
- 8 lbs.
Right: slightly larger Magic Bean
Bag - 6 lbs. 3 oz. |
Why
is this called the Magic Bean Bag? Read on and you'll
find out when you get to the end.
When
I decided to make another basic bean bag based on Scott
Fairburn's double bag design, I wanted to improve
upon my previous medium sized bean bag, namely, to make
it lighter in some way. I also wanted to use a better
fabric that was waterproof, and to include zippers so
I could empty it easily for travel. This time I decided
to document the process, since Scott's instructions leave
much to be desired for clarity and detail. For this new
bean bag I'm using some rugged and waterproof 600 denier
Cordura fabric in the popular Realtree Max-4 HD pattern,
which I luckily found on the Rockywoods.com
web site. At last check they did not have the Max-4 any
longer, but they carry their "True Timber Flooded Timber"
pattern, which is a fair substitute for Max-4. Of course,
they have other camo patterns and solid colors too. The
bean bag doesn't have to be camo, but I've used this fabric
for other projects, and I like that it will match my other
gear.
 |
| Materials
needed |
 |
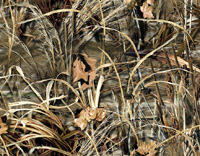 |
| Flooded
Timber pattern |
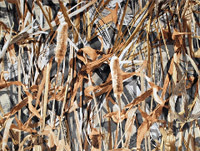
Realtree
Max-4 HD pattern |
Lets's get started:
Unlike
my earlier bean bags, I've chosen to put a zipper in this
one, mostly because I already have a suitable zipper on
hand. It took a bit of thought to figure out how to install
a zipper with this design because the obvious method for
installing a zipper on this bean bag was, in fact, nigh
onto impossible because of the back-to-back design. I
also came up with a hopefully easier means of filling
both sides of this "double bean bag" design using only
one zippered opening. The only materials needed are your
choice of fabric, and a zipper.
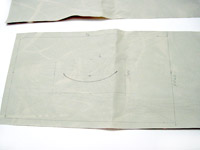
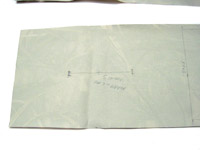
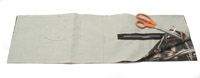
STEP A ONE: Cut two
pieces of fabric, each 8.5 inches by 28 inches (each
one makes a bag). Using 8"x26" will work quite
well too. You can alter the bag size by using different
dimensions from mine. Note that the camo pattern on
my fabric is printed on one side only, so the other side
is blank. Thus it has an obvious front and back side.
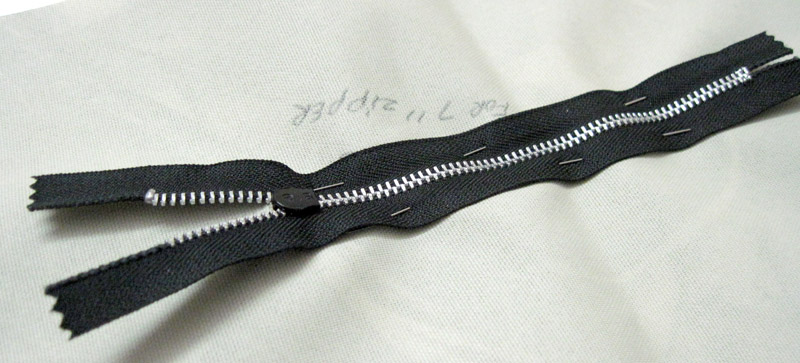
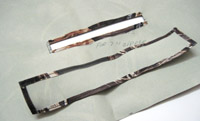
The zipper I'm using is a 7-inch metal zipper. A zipper
longer than 7 inches is unnecessary. It can be a vinyl
zipper, but I thought maybe metal would be stronger.
 |
 |
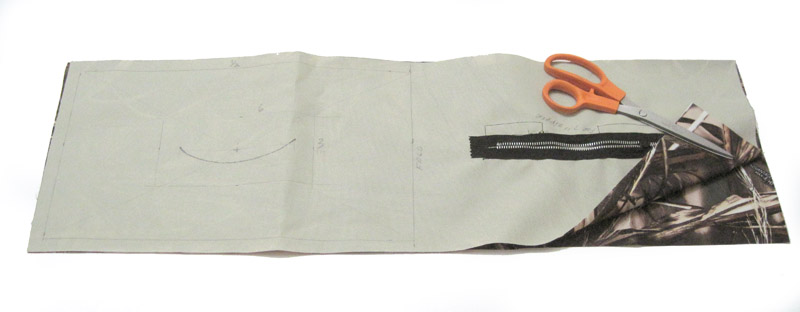
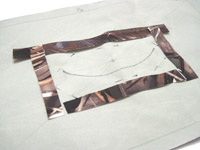
Bean
filler slot &
rectangular stitch box |
Zipper
cut-out pattern |

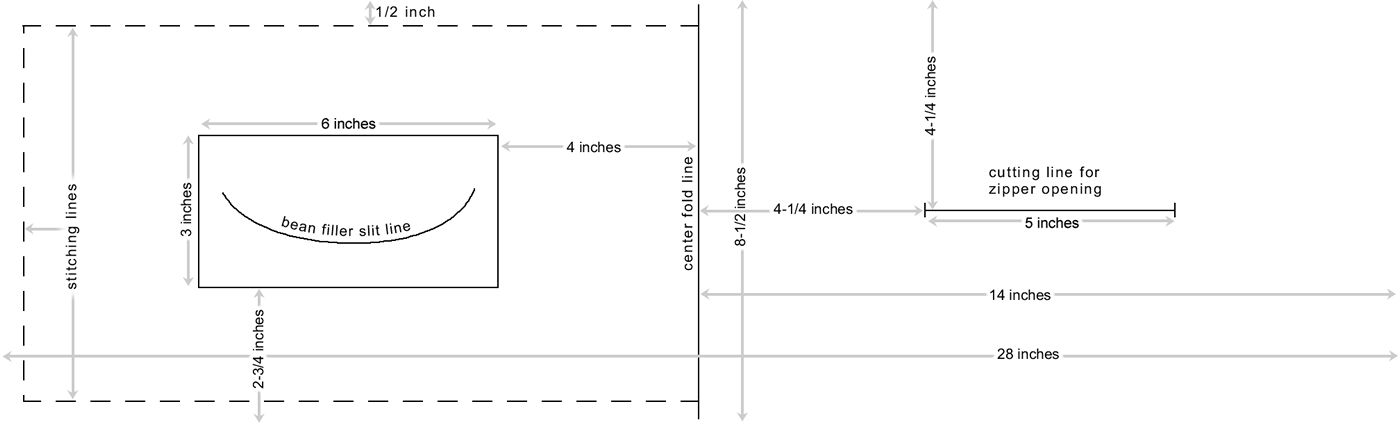
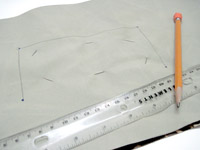
Refer to
this layout
measurements
diagram |
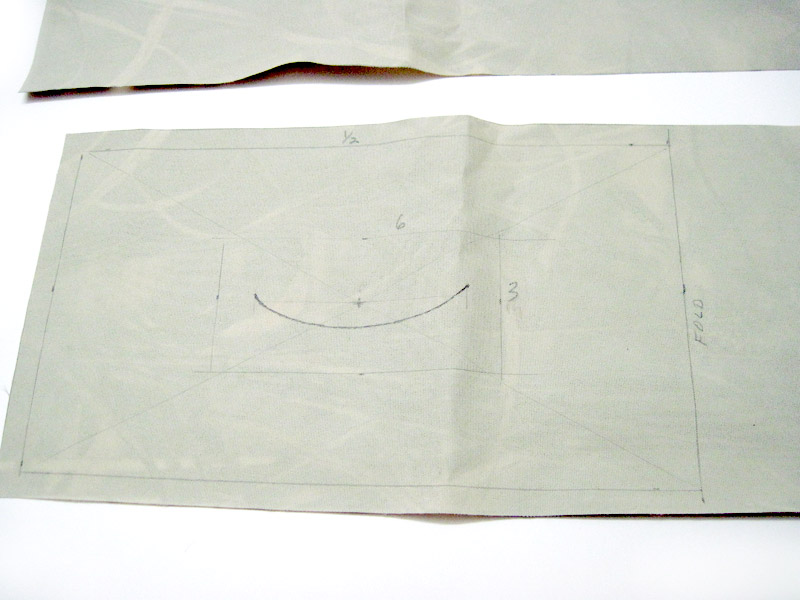
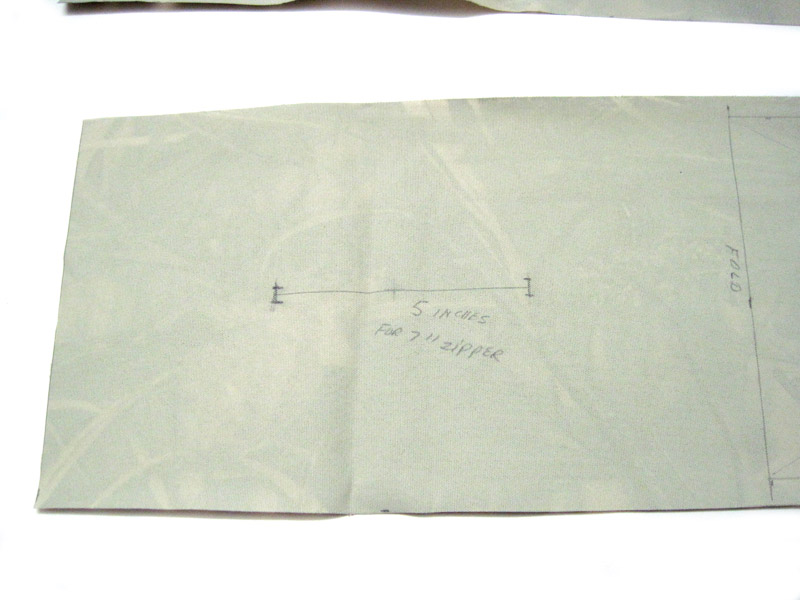
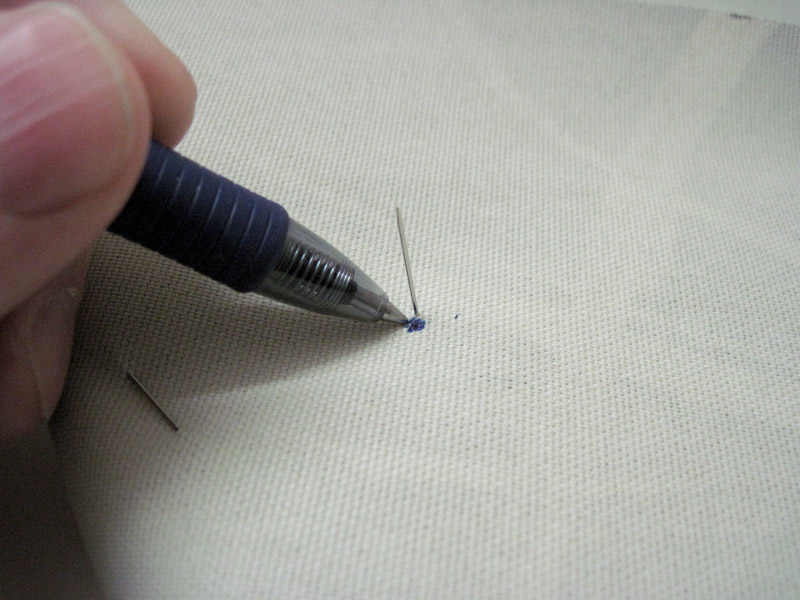
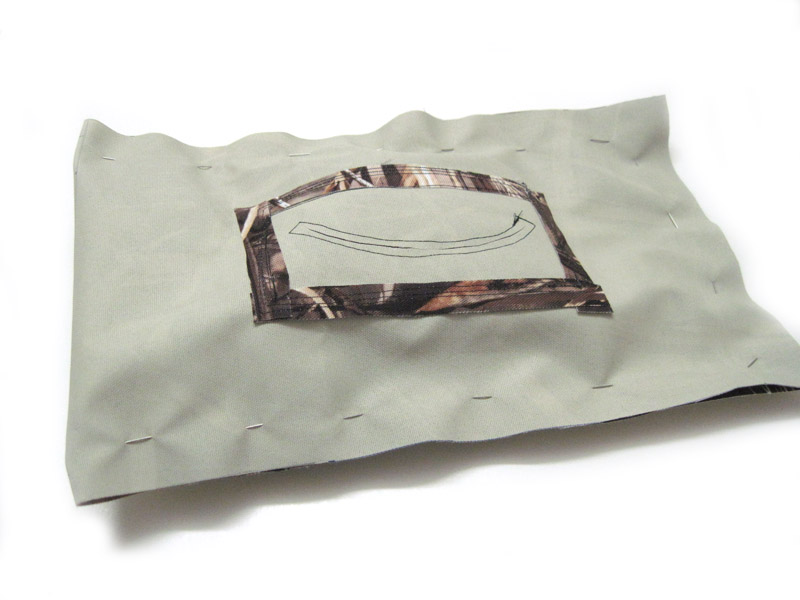
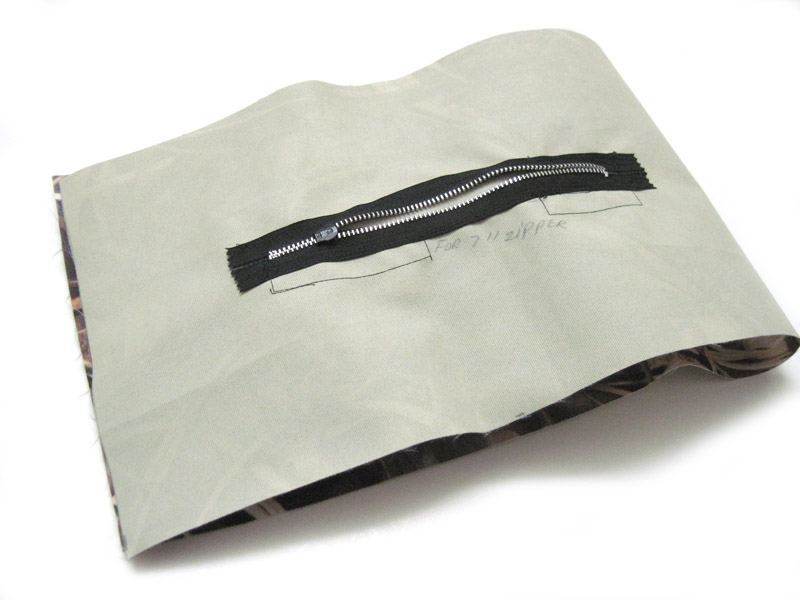
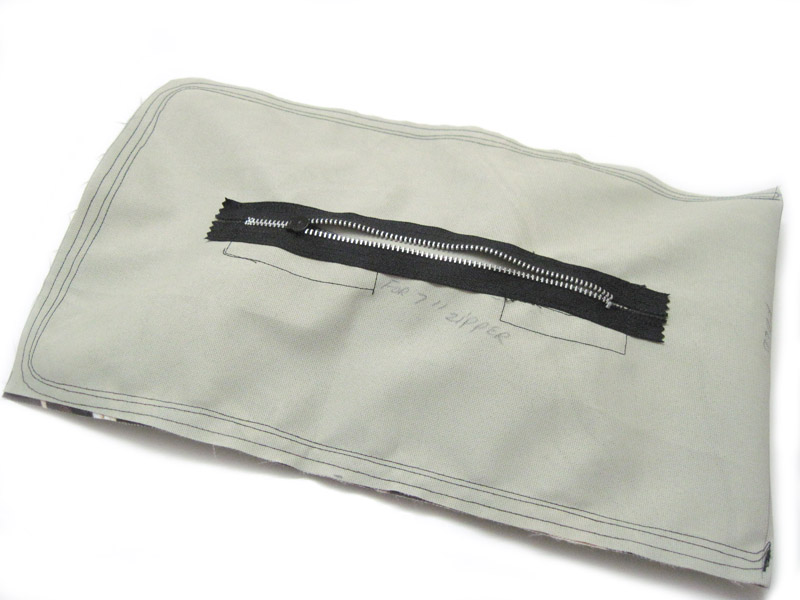
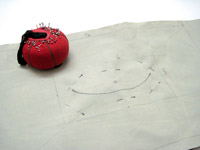
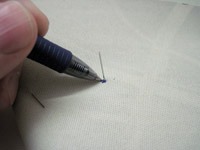
STEP
A TWO: Mark the stitching lines, zipper location,
and a slot opening for filling beans in the second bag
as shown in the photos at right. All these marks are done
on ONE piece of the fabric. Measure the 28-inch length
and mark a center line where the fabric piece will fold
in half later. The zipper slot line is drawn centered
on the left side of the fold. It is 5 inches long with
a 3/8 to 1/2-inch long "stop" line centered on each end.
This zipper slot will be cut later, but NOT now.
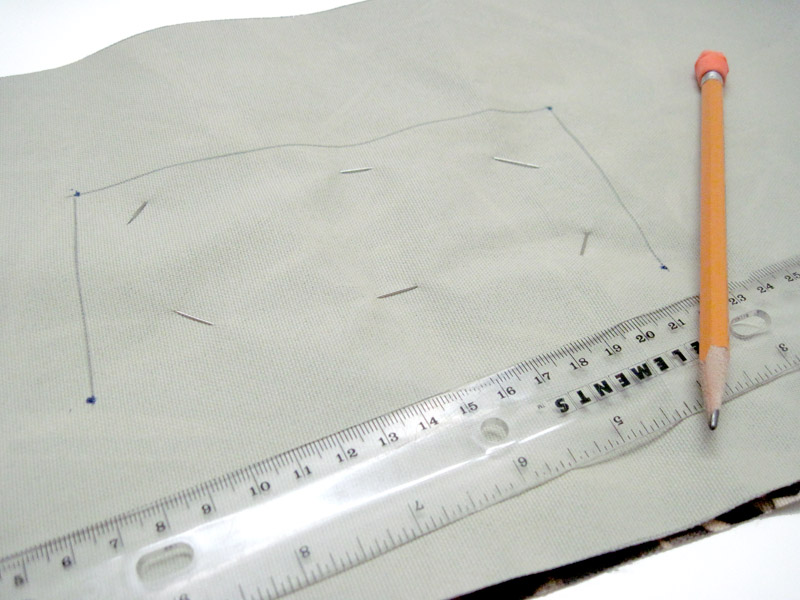
Next, on the right side of the fold, find the center point
of that half and mark a 6" x 3" rectangle in
the center. This rectangular box is the stitching line
for joining the two bean bags back-to-back. Inside this
rectangle draw a curved line as shown in the photo. This
line will be slit later so the beans can fill the
second bag from the first bag via the zipper. Also on
this half, draw a stitching line 1/2-inch in from the
three edges only (but not along the fold line). These
three edges will be stitched together to form each bag,
while the fold will make the 4th edge, requiring no stitches
there. (refer
to the layout measurements diagram for detailed measurements)
STEP A THREE: On the second piece of fabric, mark
a center line for the fold, just like on the first piece.
Also mark the stitching lines on one half of this second
piece, 1/2-inch in from three sides just as on the first
piece. No other marking is needed on this second piece
of fabric.
------------------------------------ Now
it's time to do a little sewing. -----------------------------------
First, install the zipper... But why zipper first?
The
normal procedure is to stitch these bags together "wrong
side out", leaving a gap through which you then turn
it right side out. You would then pour the beans into
these gaps and stitch them shut on each bag. But if you'd
rather have a zipper close the gap, sewing a zipper into
this opening would require accessing the back side of
the fabric, which is now INSIDE the bag. Oops, won't
work.
 |
 |
 |
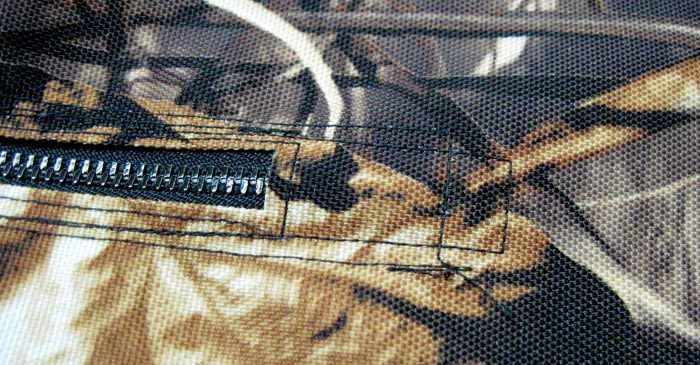
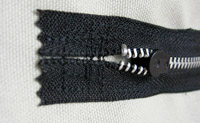
| Sewing
hem in zipper slot |
Hemmed
zipper slot edges |
Zipper
flap hemmed edges |
But
there is a solution..... put the zipper on the side of
one bag before sewing the bag shut on itself. With the
zipper pre-installed, you can sew the bag all the way
shut with no open gap, then turn it right side out through
the zipper opening. This places the zipper away from the
seam around the bag where it could potentially scratch
your lens, or your vehicle.
Here's how to do it -
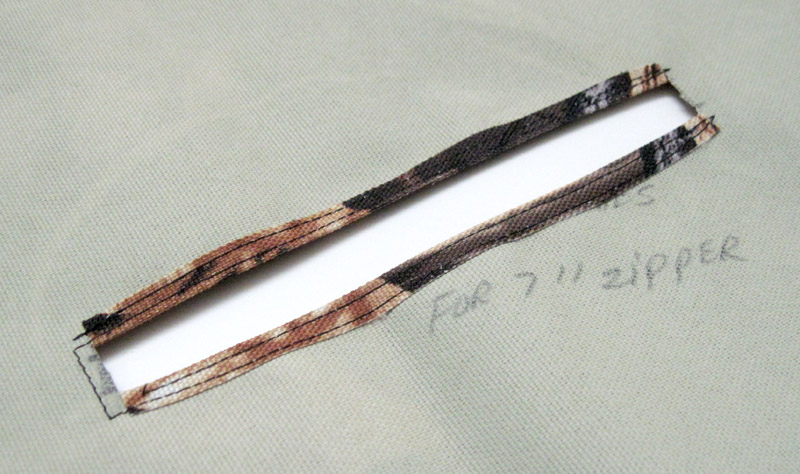
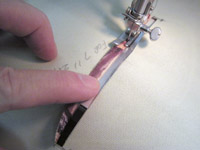
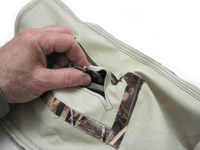
STEP
B ONE: Locate the 5-inch long mark you made for the
zipper slot. Snip along the full length of this line and
across the "stop marks" at each end to create a slit.
Then fold under each side of the slit and sew a hem to
make a neat edge that won't unravel, as in this
photo. The finished hem on the zipper slot should
look like this
photo.
 |
 |
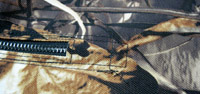
| Unzip
zipper about 1 inch |
Zipper
grip aligns like this |
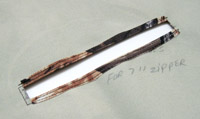
STEP B TWO: Before sewing in the zipper, we'll
first make a flap to cover the zipper. Cut out a small
piece of fabric 2-1/4 inches by 8-1/2 inches, and fold
over about 3/16 inch along all four edges. Sew this hem
to make a neat edge all the way around like the upside
down sample
in the photo. This will become the cover flap.
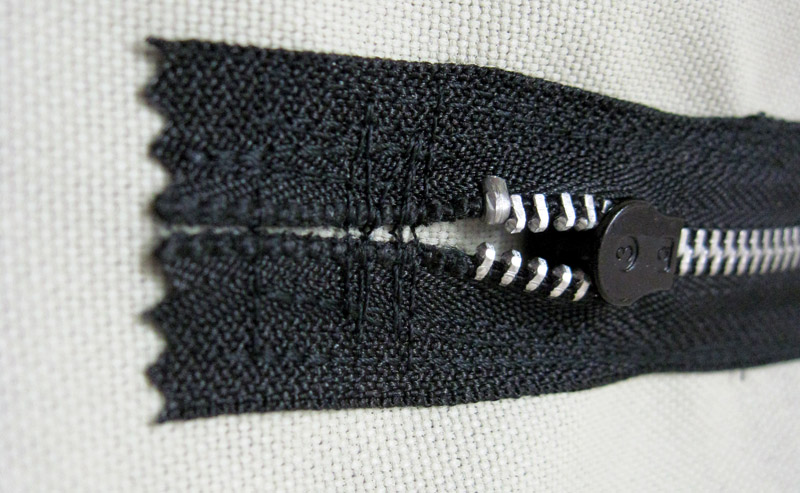
STEP B THREE: Now, unzip the zipper about one inch
as shown in this
photo and center it under the zipper slot so that
the zipper ends extend about one inch beyond each end
of the slot cut-out. With the piece flipped over you can
see how the partially opened zipper
pull tab is now at one end of the slot. The slot is
intentionally shorter than the zipper in order to help
insure beans won't fall out if the zipper isn't quite
pulled all the way shut. Now pin the zipper in place as
shown in both the photos.
|
Cloth
end tabs are
stitched close together |

Zipper pull tab can slide into
the end "pocket" to prevent
bean spills and scratches |
Tail end of zipper is also sewn
across to seal zipper slot |
Although
this particular zipper top is designed to spread apart,
in this application the zipper top will never be spread
apart. The cloth end tabs should be sewn into place to
prevent that. This photo shows how the open end cloth
tabs
are sewn close together (bottom view) and sewn
across (top view), while this photo shows the
opposite end sewn across to prevent bean leakage at
that end as well.
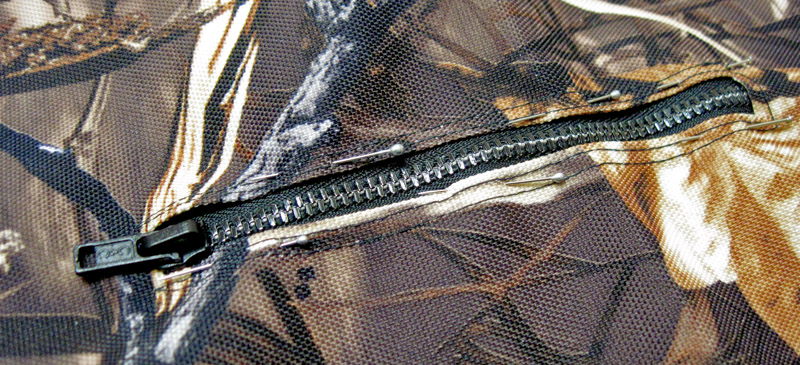
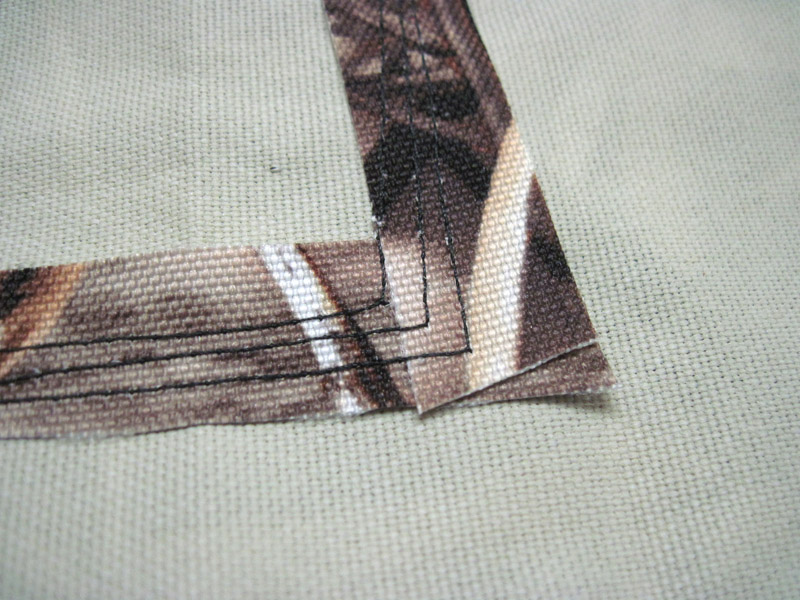
STEP B FOUR: Double stitch each side of the zipper
into place along the edges of the zipper slot. On the
end where the teeth are spread apart, pull
the tabs close together before stitching in place.
Stitch
across the other end of the zipper as well.
| |
 |
 |
| |
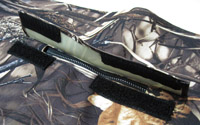
Velcro
is added to the flap and below
the zipper, then the flap is sewn on |
The
finished zipper flap protects
against possible scratches |
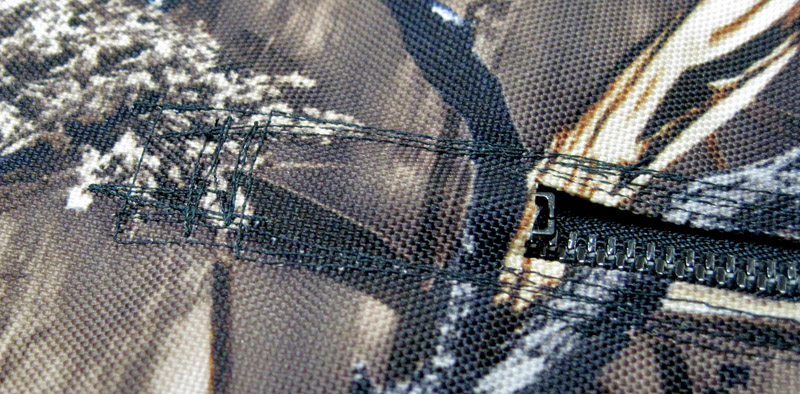
STEP B FIVE: Now for the flap over the zipper to
guarantee no scratches. Sew some hook and loop Velcro
strips below the zipper and onto the 2-1/4 inch by 8-1/2
inch zipper flap you made earlier. Then sew the flap to
the upper edge of the zipper slot, being careful not to
sew into any of the metal pieces of the zipper (you wouldn't
want to damage your needle). The velcro
and completed flap are shown in these photos at far
right.
Joining the two bean bags -
 |
| Two
pieces aligned face to face |
That seems like a lot of explaining
just to put in a zipper, but please be patient with me.
I am endeavouring to be thorough. Okay, it's time to join
these two bean bags (or maybe I should say join the two
pieces of fabric that will become the bean bags).
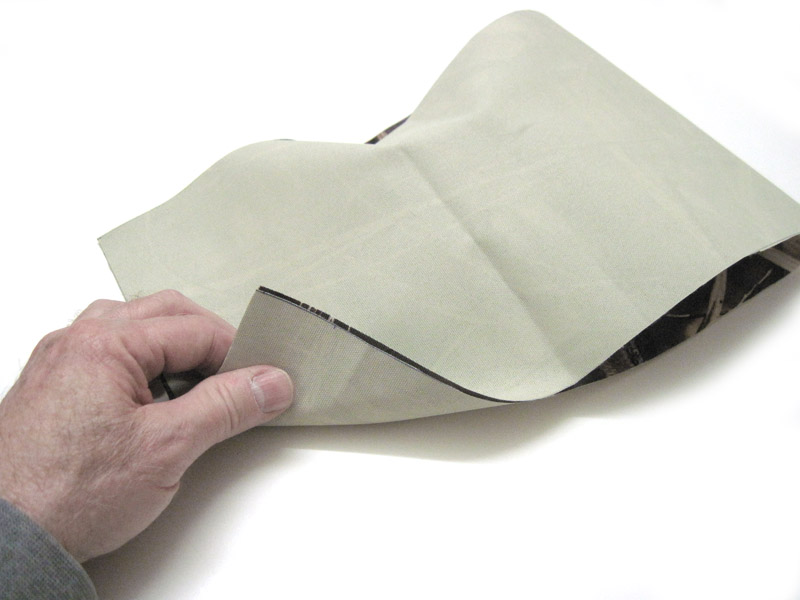
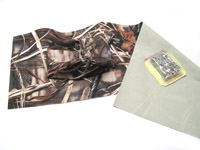
STEP
C ONE: Place the two pieces of fabric together,
one on top of the other, FACE TO FACE, or front to front
(if you prefer that terminology) and align the edges.
As you can see in
the photo, the piece with the markings is on top so
the rectangle you drew is visible. This rectangle is where
you will be sewing next, stitching around the line forming
the box. But don't sew just yet. Go on to
the next step.
STEP
C TWO: Cut some strips of fabric 3/8 to 1/2-inch wide.
You will need a total of 36 inches (3 ft.) to go around
the rectangle on both sides of the fabric. See
the photo for a better idea how this will be used.
(You can cut these strips from scraps if you wish.
It can even be a different fabric as it will be on the
inside and not seen.) These strips will reinforce
the fabric along the stitches, so use fabric at least
as sturdy as the bean bag fabric. Now, set these strips
aside until we're ready for them.
 |
 |
 |
 |
 |
How
the reinforcing strips
will be used later. |
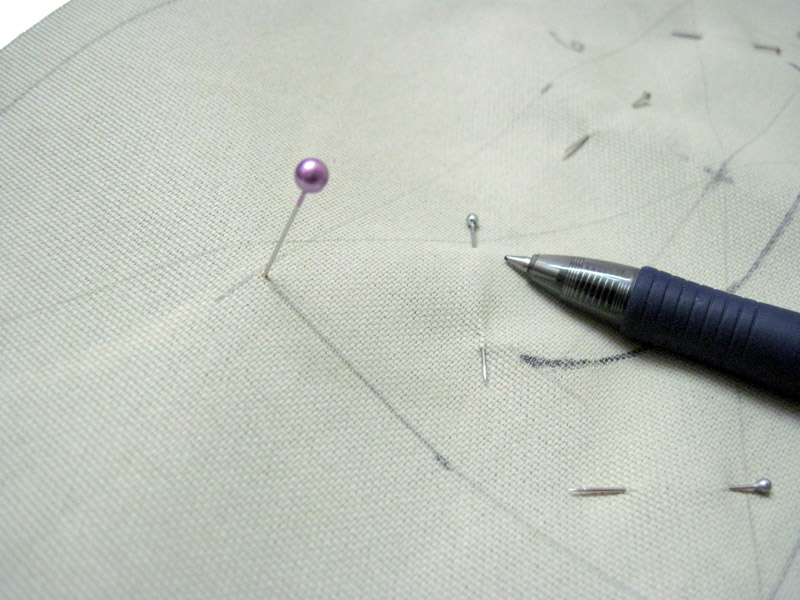
Pin
the fabric together
inside the rectangle. |
Stick
a pin through at each
corner mark of the rectangle |
Mark
a dot on the back where
the pin comes through |
Connect
the four dots to correctly align the rectangle on
the back |
STEP C THREE: With the two bean bag pieces face
to face, align the edges, then pin
the two pieces of fabric together inside the box.
This will keep them from shifting while sewing and handling.
STEP C FOUR: Transfer the rectangle lines to the
back piece of fabric so you can see where the reinforcing
strips go on the back side. --- Here's How: Stick
a pin through both pieces in one corner of the box.
Flip over the piece and mark
a dot next to the pin where it pokes through to mark
the corner position on the back piece. Do this with each
corner. Then all you need to do is play "connect
the dots" with the corner marks, and you'll have the
rectangle on the back piece correctly positioned.
|
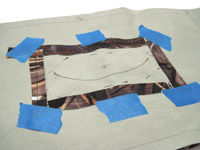
Tape
strips around
rectangle and stitch |
 Remove
tape and stitch
Remove
tape and stitch
twice more around strips |
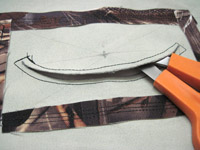 Stitch
around curved slot,
Stitch
around curved slot,
then cut through slot |
STEP C FIVE: Get the reinforcing strips you cut,
and place them around the rectangle, centering them on
the lines. Using painter's tape (or masking tape will
do), tack down the outside corners so the strips will
remain in place. Do this to the rectangle on each side.
Then carefully (so you don't knock the strips or
tape off) stitch around where the rectangle lines would
be under the strips. This does not have to be exact. Just
follow the center line of the strips. Then remove all
the pins, and remove the tape. Now you can stitch around
again about 1/8-inch outside the first stitch,
and once more about 1/8-inch inside the first stitch.
That will give you three rounds of stitching for thorough
reinforcement.
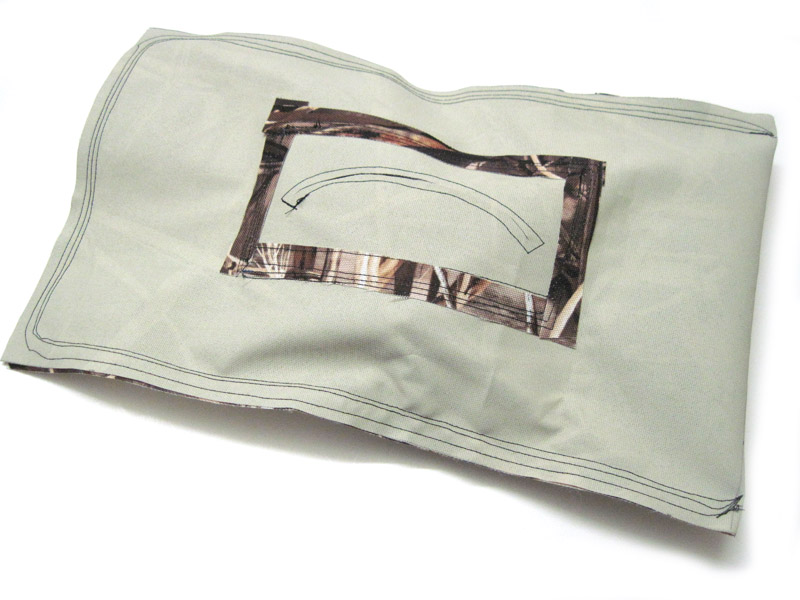
STEP C SIX: Now stitch all the way around the curved
line (the bean filler slot) in the middle of the rectangle
as in this
photo. Then snip through the fabric along the curved
line to open a slot. This is a pass-through allowing you
to pour beans into the second bean bag. The slot is curved
because it allows opening wider than a straight cut.
| |
 |
 |
| |
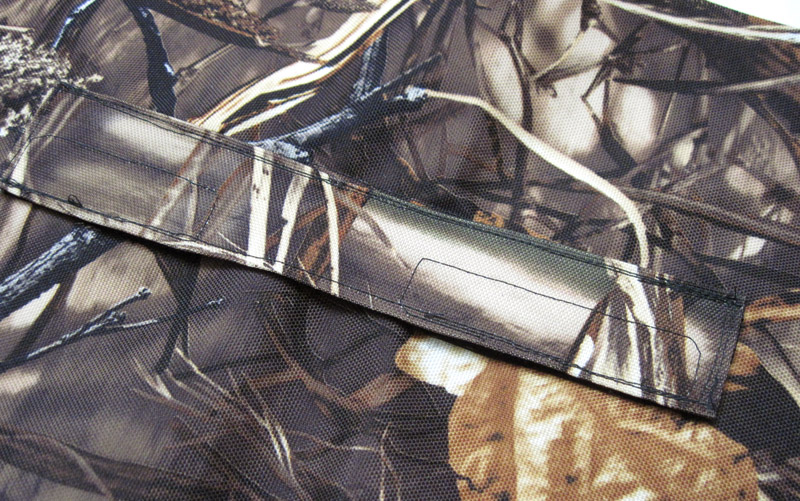
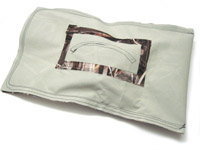
Flap
is positioned and
sewn on three sides |
Flap
helps prevent migration of beans from one bag to
the other |
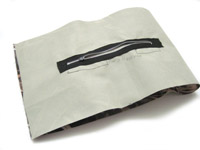
STEP
C SEVEN: The last thing to do here is to cut a piece
of fabric 6" x 3". I cut mine from a green scrap of Cordura
left from another project. This piece is positioned over
the curved slot, offset about 1/2-inch from one long side
of the rectangle to give more overhang over the curved
slot. The flap is then sewn around two short edges and
one long edge (do NOT sew all four edges). This will act
as a cover flap for the slot, helping to keep migration
of beans between bags to a minimum, while still allowing
you to fill beans through the slot. Since this flap is
on the inside, and not visible, there is no need for hemming
the edges..... unless your fabric is prone to fraying
on the edges. The Cordura fabric I am using does not fray
easily, so I didn't hem the edge.
Believe it or not, you're almost done -
Now
all that is left to do is actually sew the edges of the
two bean bags. This is where the magic happens.
| |
 |
 |
 |
| |
Fold
the fabric piece with the zipper into a bundle and
pin with safety pins |
Another
view of the bundle
pinned with safety pins |
Be
sure you can reach through
the bean filler slot and access
the safety pins for later removal |
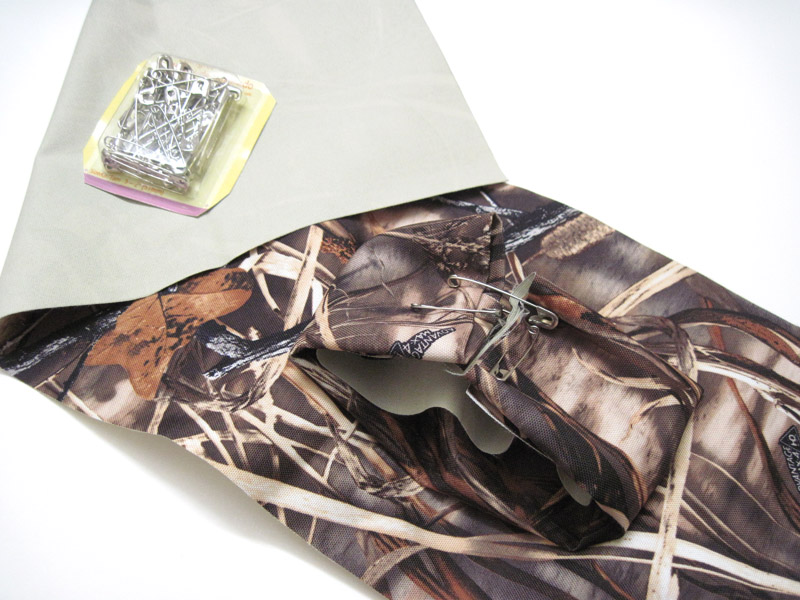
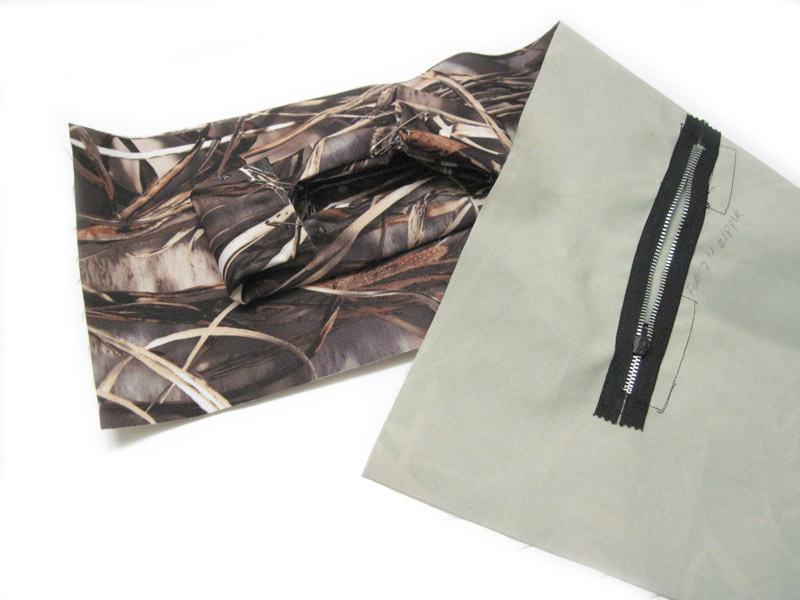
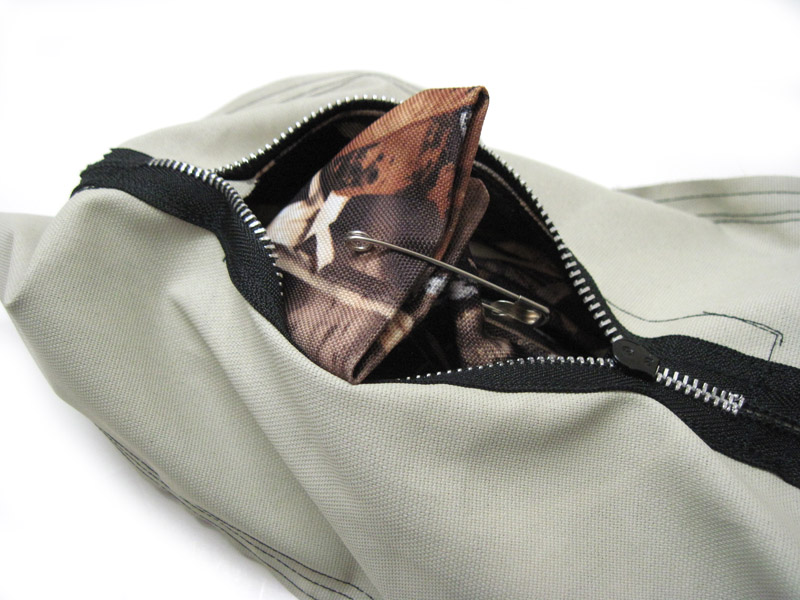
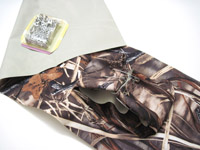
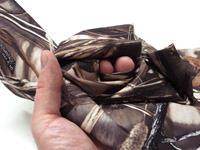
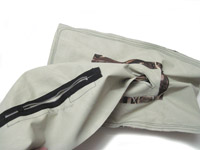
STEP D ONE: Take the fabric piece with the zipper
and fold it onto itself into a small bundle. Pin the bundle
together with safety pins. Photo
#1 and photo
#2 both show views of how this looks when done. This
is necessary to keep this half of the project out of your
way while you sew the first bean bag.
Be
sure this bundle does not get caught in the seams when
sewing the edges of the first bean bag. Furthermore,
I HIGHLY recommend using medium to large safety pins
for this. DO NOT use sewing pins. WHY? Because you will
need to reach into the sewn bag and pull out this bundle,
and sewing pins will STICK YOU and HURT. Safety pins are
much safer, and they will hold the bundle much better
than sewing pins.
Before
the next step, take time to reach
through the bean filler slot and insure you can access
the safety pins for later removal. If you pin the bundle
too tightly, you might have trouble reaching in later
to undo the safety pins and pull the bundle out.
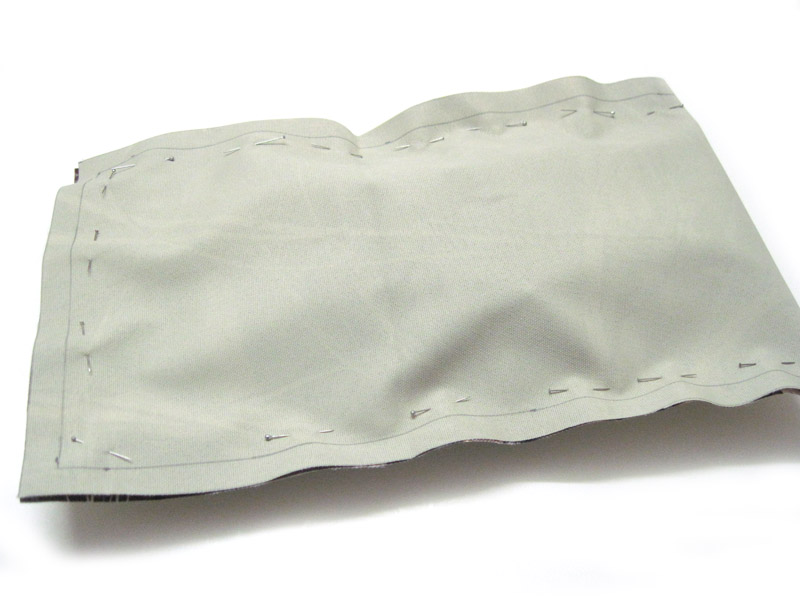
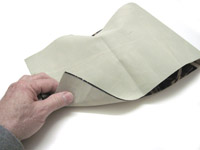
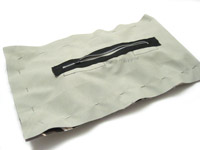
STEP D TWO: Now fold the remaining fabric piece
over onto itself, covering up the bundle as in this
photo. Then align each edge and pin all around the
edges so they will not shift. Now you are ready to sew
around the three edges, stitching directly over
the outline you drew in STEP A THREE. DO NOT sew along
the folded edge. It is completely unnecessary. Once you've
stitched once around all three edges, remove the pins
and stitch around two more times between the first stitch
and the outer edge. These extra lines of stitching are
for safety, in case a stitch comes loose. You won't have
to worry about beans leaking out or about having to repair
the stitching. The photos below will step through these
instructions.
 |
 |
 |
 |
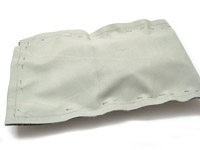
| Fold
the fabric piece over the bundle and align all the
edges |
Pin
the fabric together
around the three edges. |
This
shows the opposite
side after pinning |
Here
the three rows of stitching
are done, ready to reveal the
magic bag inside |
Are you ready for some magic?
| |
 |
 |
 |
| |
Pull
fabric and remove safety
pins through the bean filler slot |
With
your pins removed, fish
out the rest of the fabric |
Voila,
the first completed
bean bag magically appears |
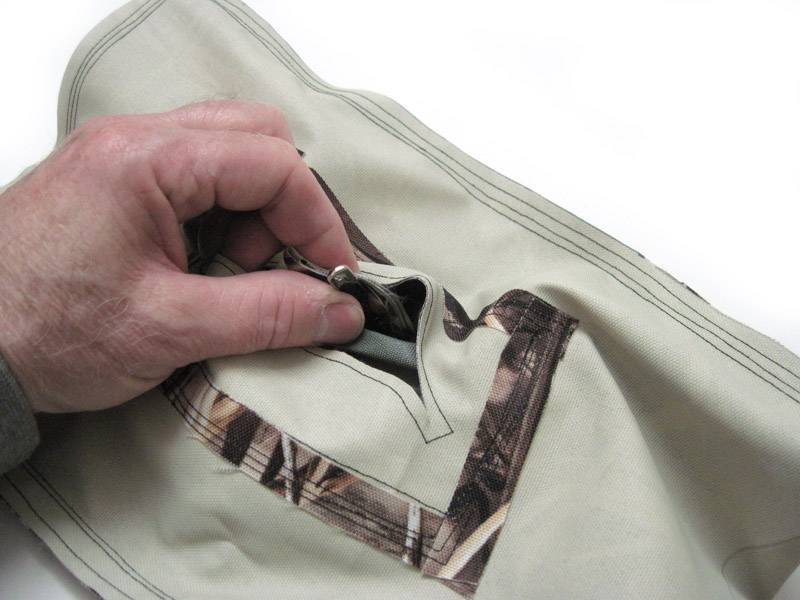
STEP E ONE: Reach into the bean filler slot and
fish around for the safety pins. You can probably pull
some fabric out to gain access to the pins. PATIENTLY
pull and tug and wiggle until you can get the safety pins
out. Now it will be easier to pull
all the insides out through the bean filler hole.
Again, be patient, tugging here and tugging there, and
soon all of it will work out through the slot....... and
VOILA,
you now magically have one completed bean bag, and
the zipper side you had bundled up is out for you to begin
sewing it into the second bean bag.
See, I told you it was magic.
STEP E TWO: UNZIP THE
ZIPPER NOW. Repeat, UNZIP
THE ZIPPER NOW. After you have UNZIPPED
THE ZIPPER (it should be open now and NOT
SHUT ), you just need to basically repeat Steps D
One and D Two. Fold up the completed
bean bag into a small bundle and pin it with safety
pins so it won't get caught in the stitching when you
sew around the second bag. Next,
fold over the fabric piece with the zipper so you
see the back of the zipper, and so the bundled bag is
covered up. Align the edges and pin
around the edges as before. Now, be sure the ZIPPER
IS OPEN. It has to be open so you can later pull out the
other magic bean bag. It could prove difficult to unzip
the zipper from the wrong side when you can't get to the
pull tab.
| |
 |
 |
 |
 |
| |
Fold
the first bean bag into
a bundle and safety pin |
Fold
zipper side
over bundle |
Pin
three sides
for stitching |
Stitch
all three sides
and remove pins |
STEP E THREE: With the edges now aligned and pinned,
you are ready to sew
around the three sides as before. After stitching
around once, remove the pins and then stitch twice more
around for safety. When you finish stitching, simply reach
into the zipper opening (you DID have the zipper open,
didn't you?) and begin
pullling out the first bean bag that is bundled up
with safety pins. With the safety
pins removed and the full insides pulled out.....
| |
 |
 |
 |
 |
| |
Pull
up the pinned bag
and remove safety pins |
Patiently
pull the remainder
of the bag through the
zipper opening |
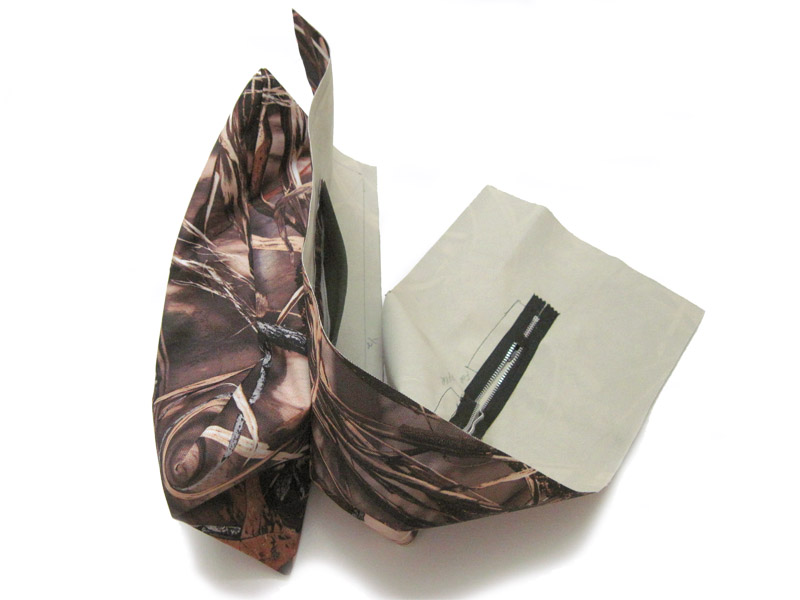
Abbra
Cadabbra... two
completed bean bags
attached together |
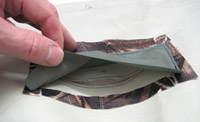
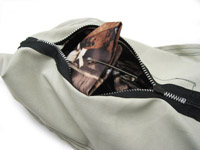
Fill
both bags via
one zippered opening |
Abbra Cadabbra..... you now have two
fully seamed bean bags attached together.
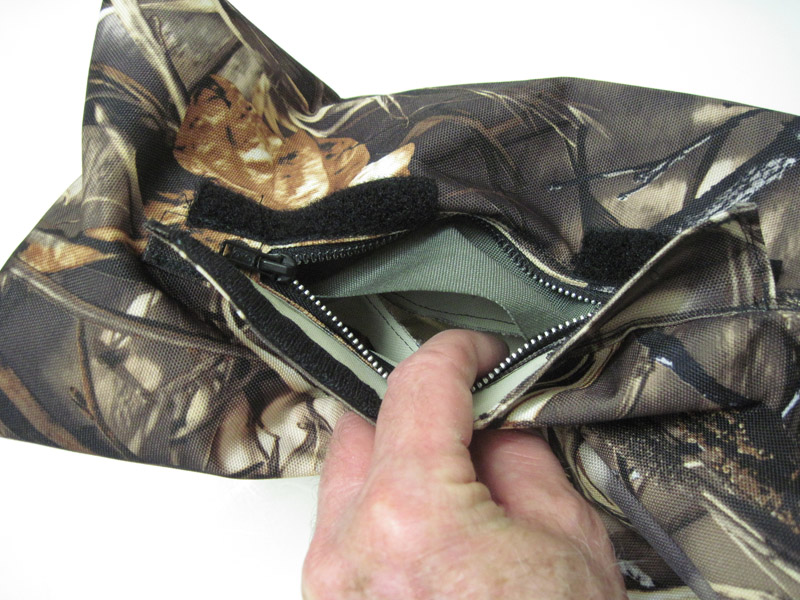
Unlike
my other bean bags, this one is much more easily filled.
Using a single
zippered opening to fill both bags eliminates hand
stitching altogether. It also allows me to fill and empty
the bag very easily, in the event I need to travel with
lighter weight.
| |
 |
 |
| |
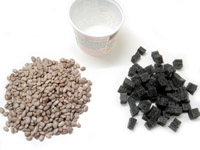
8
lbs. of dried beans looked
like about the correct volume |
Substitue
filler of 1/2"
cubes of dense foam |
Getting the Magic Bean Bag ready to use -
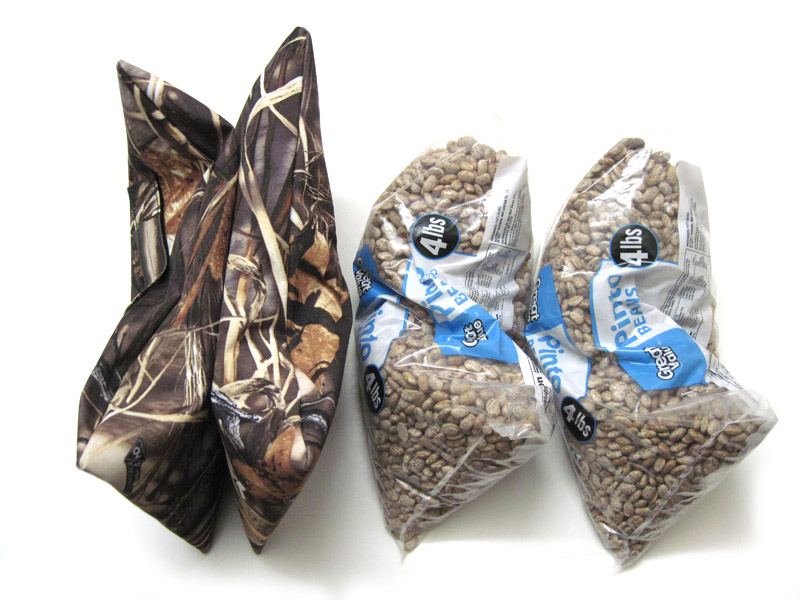
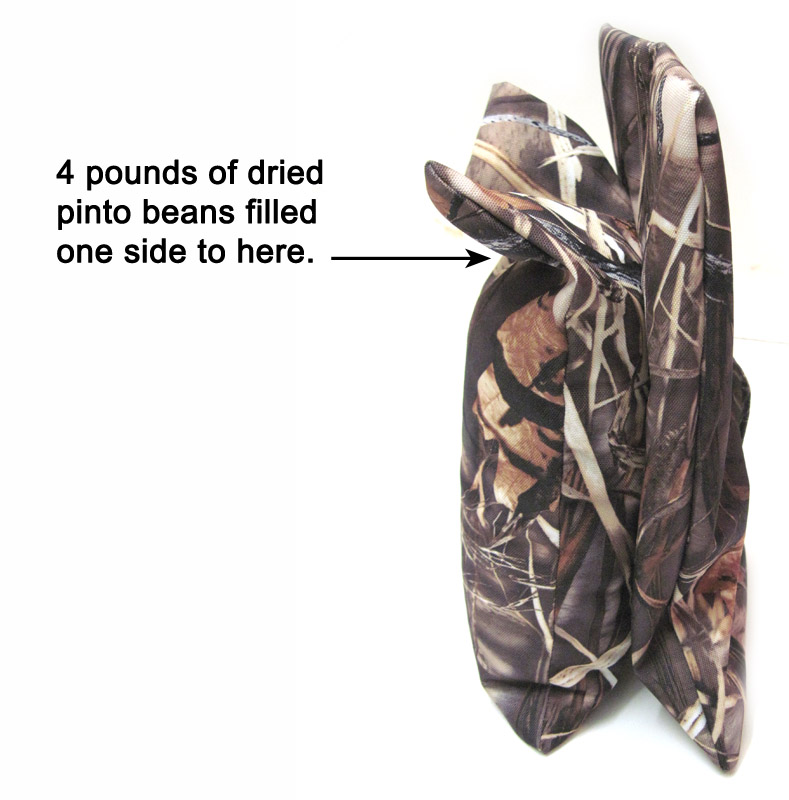
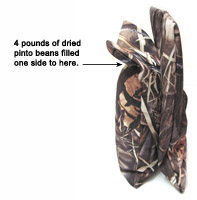 |
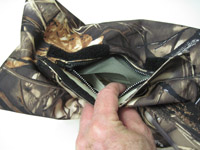
4
lbs. of pinto beans filled
one side only this far, correlating
to both sides requiring
over
9 lbs. of beans |
How
much does this double bean bag hold? I started out with
two
4-pound bags of dried pinto beans, and poured one
full bag (4 lbs.) into one side of the bean bag. It was
about
80% full. That was just a little bit slack for my
taste, though it may suit some folks just right. I'm estimating
it will actually hold 4-1/2 pounds per side, tops. I'm
pretty sure you cannot cram 5 pounds into one side. If
you could, it would be too stiff to form well to the lens
or a car door. So my estimate to completely fill both
sides will be 9 to 9.5 pounds of pinto beans (4.5 to 4.75
lbs. per side). If your bag dimensions are different from
mine, then you will need to adjust your expected amount
of filler.
I
specify "pinto beans" because that's what I used. If you
were to use some other filler... as in larger beans, or
smaller beans, peas, buckwheat, etc., ..... they will
have more or less air space between each "bean" and therefore
will alter the amount of that kind of bean needed, as
well as the total weight. Just be aware that different
filler materials will come out with a different weight-to-volume
ratio.
| |
 |
 |
 |
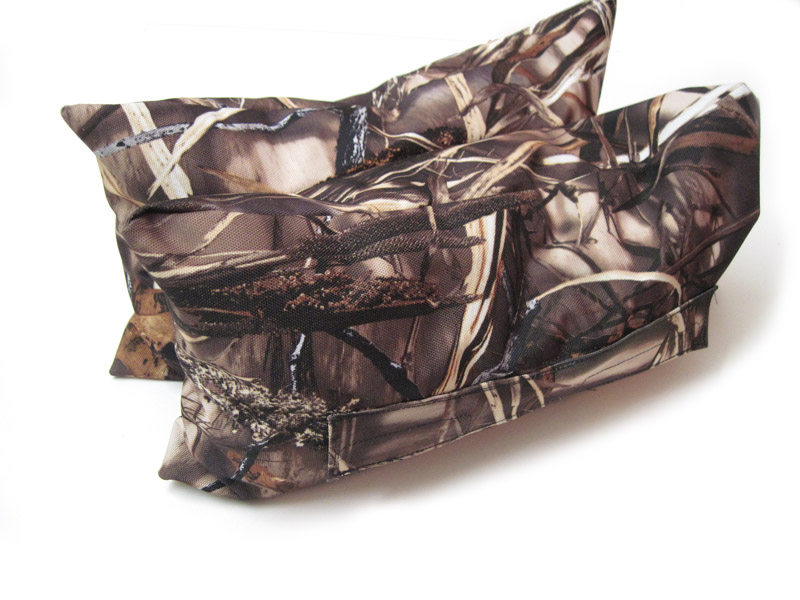
| |
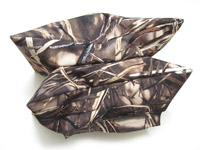
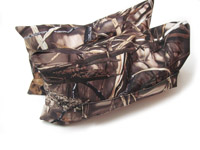
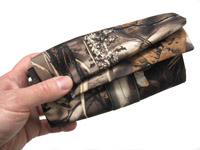
The
Magic Bean Bag
ready to use |
The
finished Magic Bean
Bag with no filler |
It
folds up into
a small package |
This
"weight-to-volume ratio" can be altered by using
other filler material as well. I tried an experiment here,
hoping to cut down on the weight, while still filling
the bags. I have some odd "foam" that is sort of slick
and plastic-like, and it's much firmer (compresses only
about half as much, or less) than the dense gray foam
I use for equipment padding. It's no good for padding,
though it is used to make form-fitted molded spacers for
products like TVs and heavy weight items in boxes. I diced
up some of this stuff into little
1/2-inch cubes and mixed it in with the beans to take
up space without adding weight. I wanted to see if I could
reduce the weight while still maintaining a good conformity
to my lenses, car door, etc.
My
mixture (by volume, not by weight) is about 1/3 diced
foam and 2/3 beans. Instead of requiring about 9 pounds
of beans, it worked out to only 6 pounds of beans, plus
the 3 ounces of foam pieces and fabric. This filled my Magic
Bean Bag just right. It feels like it's all beans, and
conforms the same as before, but weighs at least three
pounds less than using all beans. I'm extremely pleased
with the results. |
| |
|
|
 |
|
 |