|
|
|
|

The Butterfly
Bean Bag version II
An improved design
|
 |
The
Butterfly
Bean
Bag
version II
|
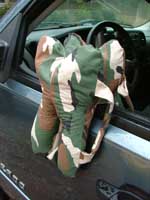
I
often photograph birds from the window of my vehicle in
situations like a wildlife refuge, when a bean bag in
the window is all the support you need. I've made three
double bean bags for this type of photography, all sewn
from the pattern in an article by Scott Fairbairn.
The first one I made before I got my prime
lenses was small. Later I made a second one about 50% larger (my
"medium size bag") to use with my Canon 500mm
lens. Then I made another one just 10% larger than the
medium size bag, but with some improvements, which I call
my Magic Bean
Bag. While these basic double bean bags worked
well for general use, I found that I sometimes needed
an even larger (taller) bean bag to use on the door of
my truck.
Even
in my full-sized truck, the camera and lens sat too low
in the window to shoot comfortably. I had to slump down
into the seat to see through the viewfinder. The bean
bag needed more height. I tried stacking two bean bags,
but they would slip apart. I didn't dare use the window
to raise the bean bag, camera and lens. That much weight
on the power window mechanism seemed a very bad idea.
It was designed to raise a piece of glass, not 20 pounds
of deadweight.
 |
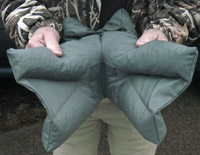
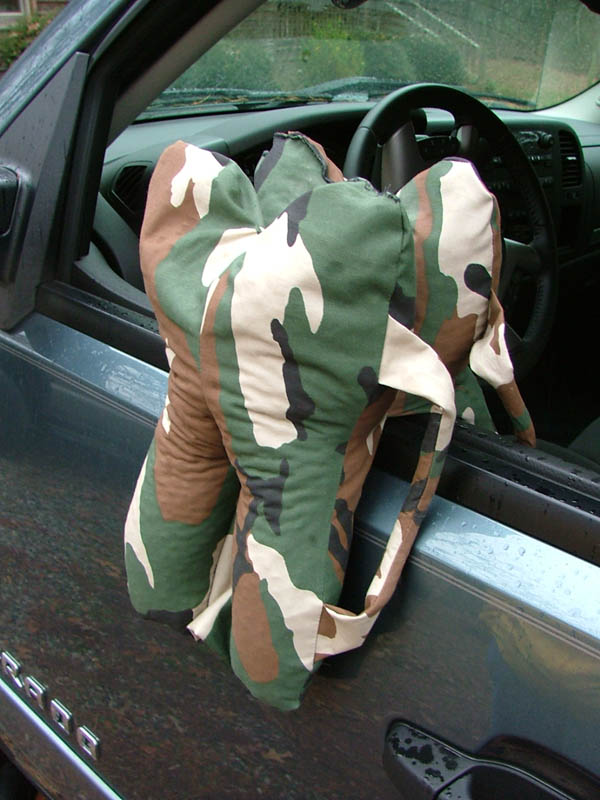
The
tubular bottom
design improves
rigidity and cuts the
weight by 4 pounds.
|
|
The
original
Butterfly Bean Bag |
I
had looked at every bean bag I could find on the web,
but none seemed to provide enough height above the window
for comfortable shooting. The larger the bag, the heavier
it was going to be because it would hold more and more
beans. Some commercial bean bags weighed as much as 20
pounds. So, I resolved to create something better, and
came up with the idea for my own taller, lighter bean
bag, which I call the Butterfly Bean Bag because of the
shape of its pattern. I used the basic back-to-back "double
bean bag" construction technique from the bean bag on
the Scott Fairbairn website, and combined it with the
general "molar" shape of other large bean bags. The advantages
of my design are:
• Weighs less
for its size than other designs
• Stands far taller
than any other design of same (or even similar) weight
 |
How
to make your own
version II |
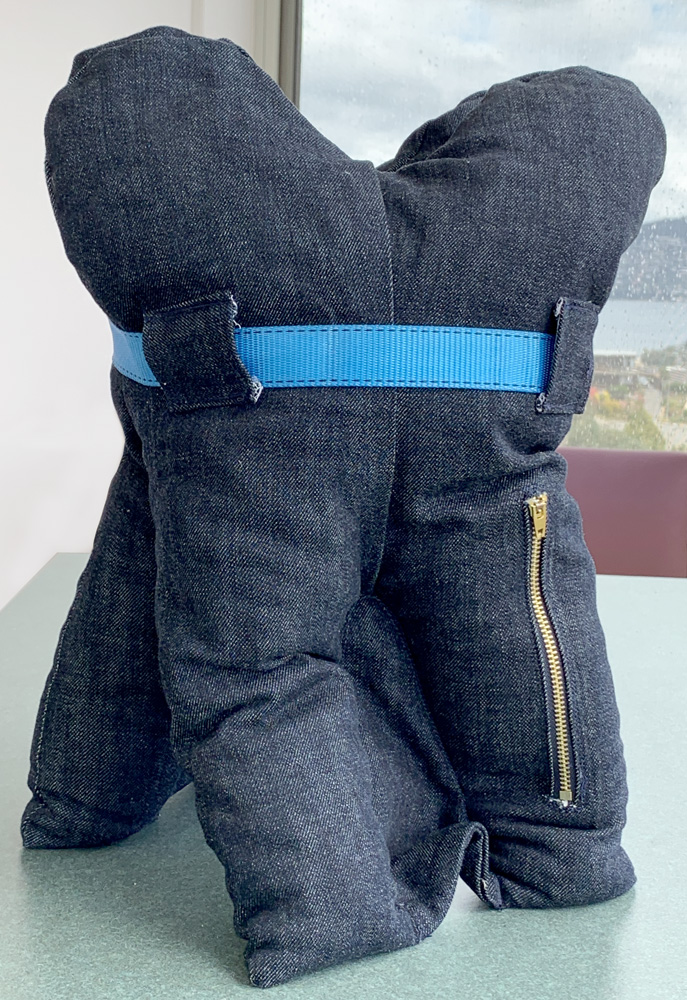
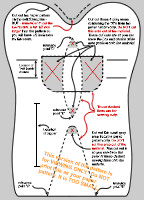
To
accomplish these improvements I made the top half (above
the "V") taller than other designs, and added stitching
to shape the sides and make them stand up stiffer. Otherwise
the extra height would have been lost due to the sides
bulging out and drooping like other bean bags. I also
closed off a large portion of the bottom half so it didn't
fill with unnecessary beans. This created four
tubular colums, providing a firm base hanging
over the vehicle door so the bag stands up taller and
stiffer. Without this design feature, the extra height
would have required an additional 4 pounds of beans to
fill it. As designed, it gives greater height while retaining
the bulk necessary to handle super-telephoto lenses. I
don't pretend the material I used is as rugged, or that
the stitching is on a par with commercial products. That
part of the construction is up to the discretion and skill
of the do-it-yourselfer who is making one. Mine is quite
rugged enough for my use.
If
you would like to see and make the original design, the
"how-to instructions" are here.
Update: Improved version
II
After
several years using the original design, I came up with
some minor improvements in the design, including a major
6 pound reduction in weight. The improvements are
subtle for the most part, but they not only make it lighter,
it's easier to fill (and easier to empty for travel),
and strengthened as well. I incorporated some of what
I learned while making my "Magic
Bean Bag", including using the stronger and
more waterproof Cordura fabric. (Cordura is the type of
fabric used in backpacks and camera bags.) Also note that
I have endeavored to make the instructions even easier
to follow for this improved version.
If
you would like to make the improved version II Butterfly
Bean Bag, continue on to the complete
step-by-step instructions.
The following are some testamonials to how well this
bean bag works.
User
Emails and Comments on the bean bag project:
Proof it's not so hard to make - Malaysian
nature photographer Dr. A. R. Radzian shows off
his version of the Butterfly Bean Bag
--- Photo
one (materials and printed pattern) ----
Photo
Two (finished bean bag) --- link
to full blog entry of June 2009 (scroll way
down ) --- Dr. Radzian wrote: "I know a few
of my friends also made the similar bean bag when
I posted it at PhotoMalaysia.com."
Tested, reviewed and approved on safari - Gets
highest rating - On the "Chobe Safari"
website, for Chobe National Park in Botswana,
author and photographer P. B. Eleazer tested 21
commercial and DIY bean bags and rated them in
a web article. I was pleased to find that my bean
bag design received his highest rating along with
two expensive commercial bean bags. In fact, he
made two of my design for himself. Now that brought
a smile to my face.
Here's another photographer's take on my
Butterfly Beanbag. Roy Bertalotto posted his version
of my beanbag design on
his blog.
Butterfly Beanbag survives Hyena mauling ...
some beans did not - Received this fun
report from Mary Anne A. who made the Butterfly
Beanbag for her Tanzania/Serengeti safari.
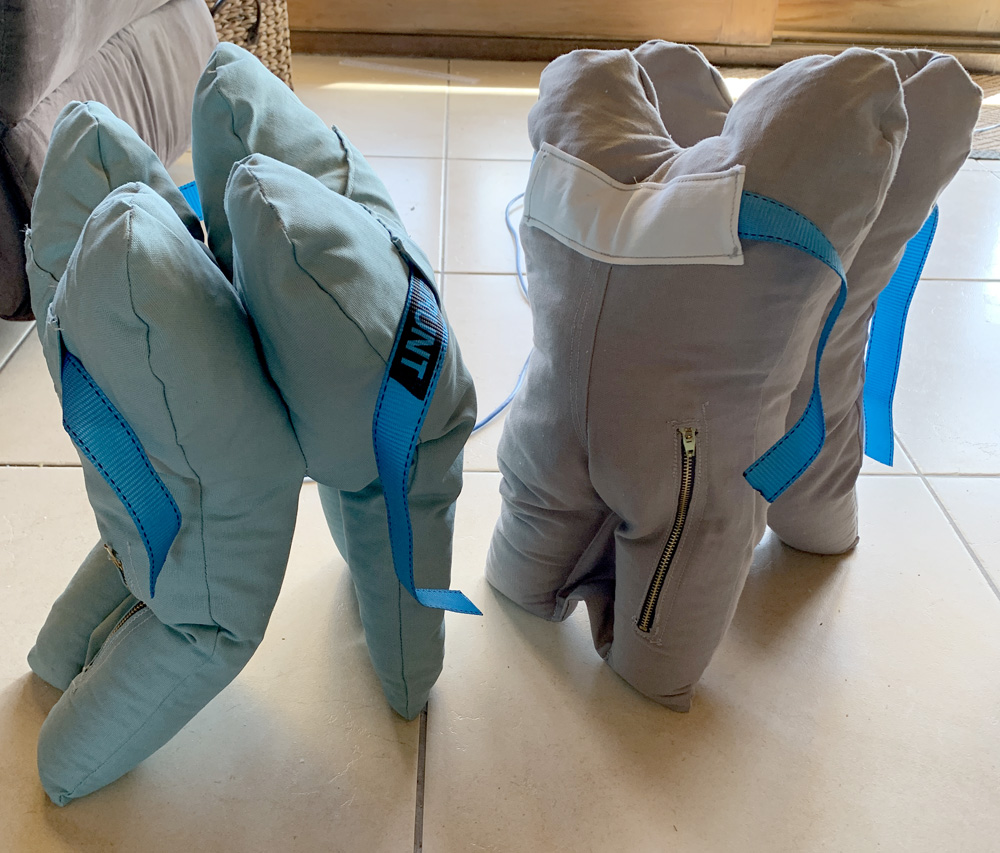
Butterfly Bean Bags from "Down Under" - Julia
Brown from Australia sent an email and photos of
her Butterfly Bean Bags -
Julia
wrote: "Hi Fred. I just wanted to thank
you very much for the butterfly bean bag version
2 pattern. We live in Australia and my husband
Tony is a passionate bird photographer and I love
sewing. Ive now made 3 - one for each car and
one for a friend. Its a great design and works
perfectly. Id been trying to design a photobag
pattern when I came across yours. So why [re]invent
the wheel. Obviously a lot of thought and time
went into your pattern. We filled ours with rice
in the base and high density foam crumbs in the
top. Thanks again... Kind regards - Julia Brown"
|
|
| |
|
|
 |
|
 |