|
|
|
|

GoPro Chest Mount - DIY Style
|
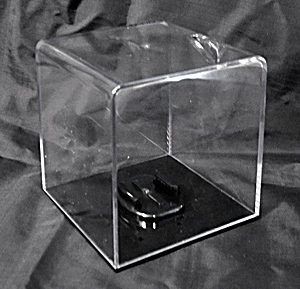
Anyone who has purchased a new GoPro
video camera will recognize the item below - the plastic
cube that houses new GoPros inside that "bear-proof" packaging
the GoPro cameras come in. Most folks likely chucked this
packaging, but my habit is to save packaging for at least
a little while in the event I have to return an item to
the store.
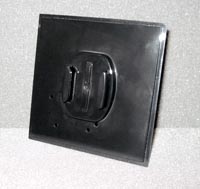
In
the case of this cube, I noted the black plastic base
with the custom GoPro "clip" made into it. Being the do-it-yourselfer
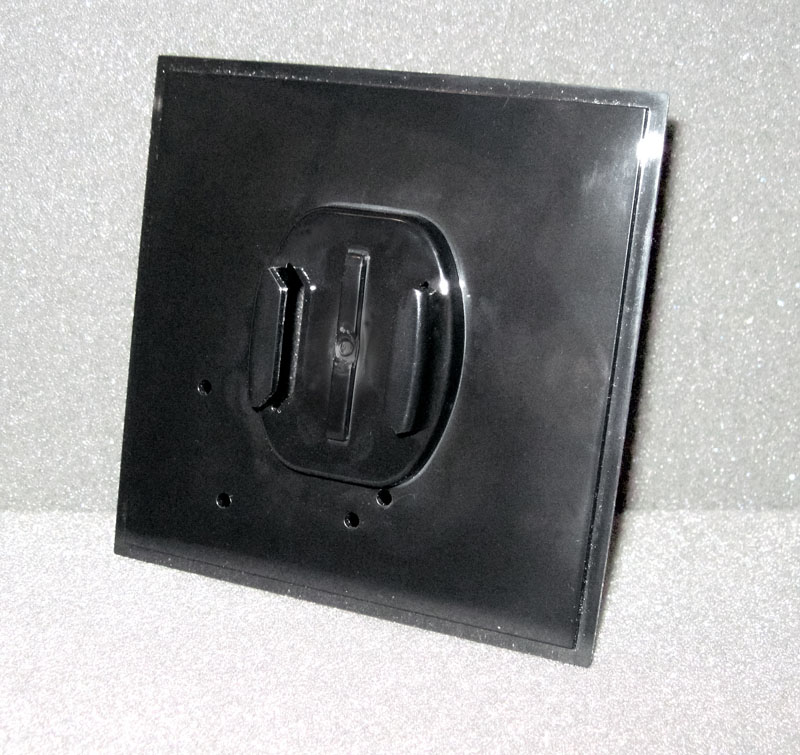
that I am, I wondered if it might come in handy at some
point, so I made sure to hang onto this item. Eventually,
the need arose for trying a chest mount with my GoPro,
so I headed for the store and checked out GoPro's "Chesty"
product. But after taking a look at their $40 mount, bells went off in my head. The bracket of their "Chesty" mount was essentially the same thing as this black plastic base from the cube, shown at right below.
|
I
could see that all I needed was about $3.00 worth of black
web strapping and a couple of snap buckles for $5.00-$8.00
and I could turn this into a perfectly suitable chest
mount. I already had on hand some snap buckles and ladder
locks (for adjusting strap length) which I use often to
make various straps.
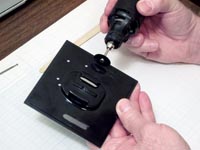
It
was a simple matter to cut four slots in the mounting
base with my Dremel roto-tool, and cut off the corners
of the base so there would be nothing sharp to poke me.
If you don't have a roto-tool, you can make the slots
easily by drilling a string of 3/16 or 1/4 inch holes
closely together. Then snip out between the holes and
file the edges smooth to shape the slots. I smoothed the
edges of the cutouts and corners with a cardboard fingernail
file to avoid any abrasion of the webbing or clothing.
A fine metal file will do nicely as well.
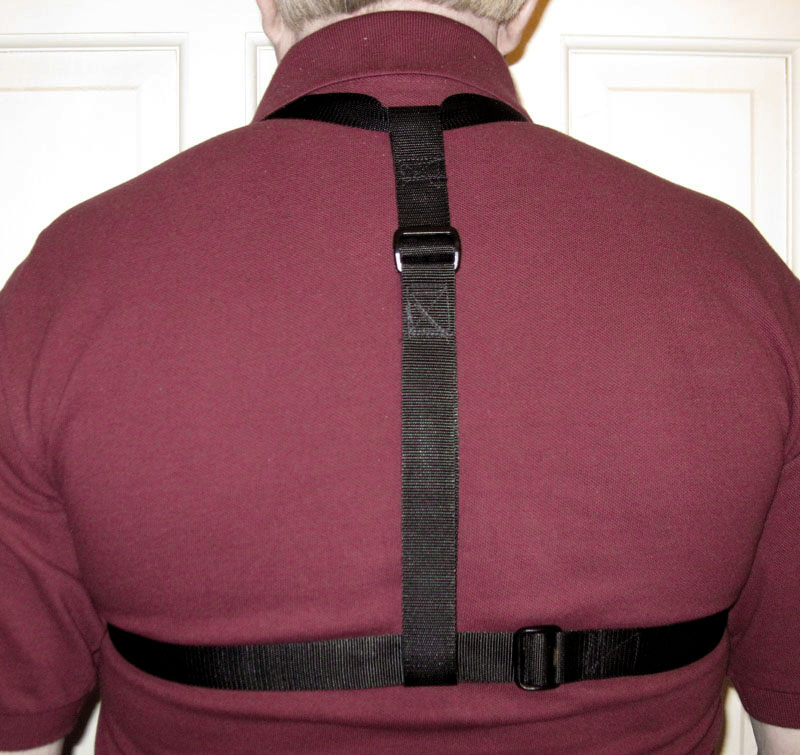
Then
I went about cutting the webbing, and sewing the webbing
and buckles, and attaching them to the slots in the mounting
base. I used a combination of 1 inch and 3/4 inch webbing
and buckles, but you could use up to 1-1/2 inch webbing
for the chest strap if you wished. You may be able to
press into service some old straps or belts from unused
bags, kids backpacks, etc., for part of your strapping.
Make use of whatever you have. I get my buckles and webbing
from REI outdoor outfitters, though I imagine the items
can also be ordered online.
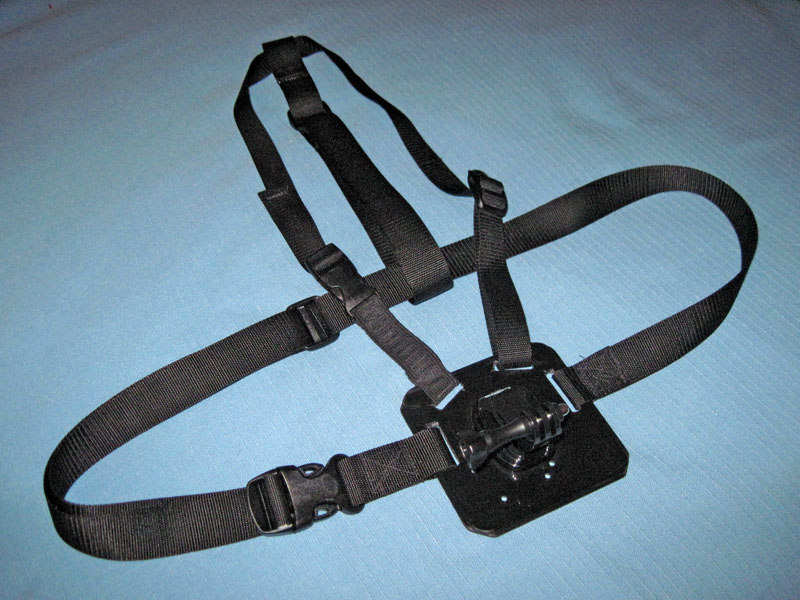
I won't attempt to go into
detail about the straps, buckles and ladder locks. You
can take a look at the GoPro Chesty, and look over my
photos below of the finished chest mount to decide how
you wish to go about making the straps. Mine are not exactly
like the GoPro product, as I had no molded "Y" connector
for behind the neck, or other preformed connectors. I
just made do with what I had, using a little common sense.
Don't forget to take into account how the adjustments
will work, allowing for the straps to slip through each
other if necessary. I did allow for considerable sizing
adjustment for use over a heavy coat.
I
would note that if you will be using yours for "extreme"
activities, you might consider the manufactured GoPro
Chesty product. I would assume it is designed for the
considerable stresses that might be encountered with such
activities as extreme sports. I have no plans to use mine
for anything more demanding than hiking or paddling, so
I feel confident it will be more than sufficiently sturdy
for my needs.
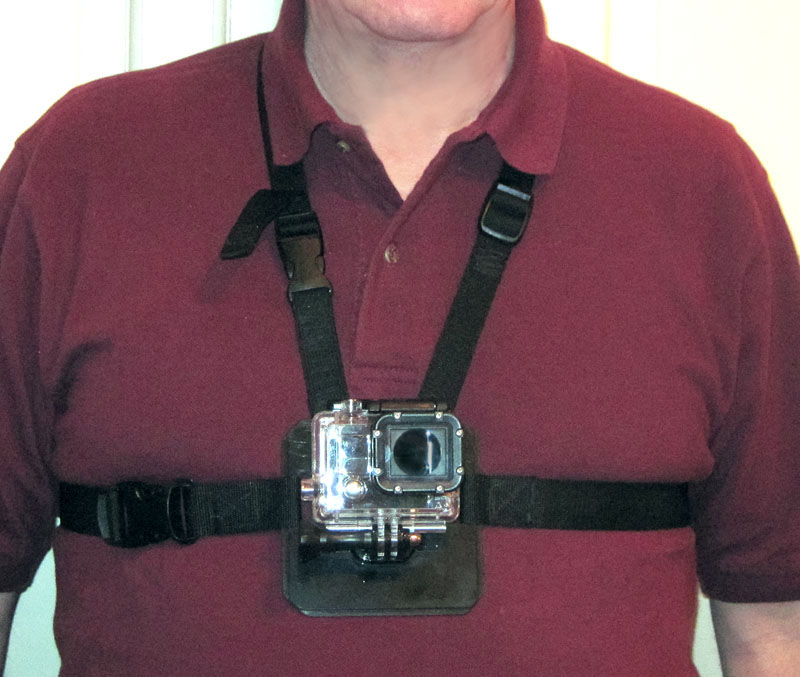
This
project turned out to be easier than I expected, and was
completed in a single day of on and off work - perhaps
4 hours total - some of which was spent more or less pondering
how to go about its construction. For less than $10 invested
in materials for a camera chest mount, I was very well
pleased with the results.
You might also check out my
article on making a Rotating
GoPro Camera Mount for a kayak.
|
| |
|
|
 |
|
 |