|
|
|

Waterproof Camo Cover for Backpacks
|
 |
Waterproof
cover in
Advantage Max-4 HD camo |
Yeah, I
know ... my backpack is already "waterproof", but hear me out.
My latest outing to photograph wild horses took me into saltwater
marshes with sopping wet, soggy ground of mud and muck, with
that marsh methane gas smell. If you've ever been there, you
know what I mean. I did not relish the thoughts of my new backpack
coming back from such an outing with that muck caked on the
outside. Worse yet, laying the pack down on its back (i.e. harness
and hip belt) to access gear in such a situation would make
a royal mess on the harness, and thus my hands and clothes as
soon as I tried to put it back on.
 |

Top-
bottom "box"
Left- Hood section
Lower left- attaching main hood
Below- attaching harness hood |
 |
 |
| |
Lucky for
me, about the time I received the backpack, I also located a
source for 600 denier polyester waterproof material with a waterproof
back coating. Essentially it is the same thing most backpacks
are made from. Better yet, it was in my favorite camo pattern,
Realtree Advantage Max-4 HD, a favorite among wildlife photographers.
Right away I set about figuring out a design to protect my backpack,
and thus myself and equipment, while providing a camo cover
for my "luggage look" backpack.
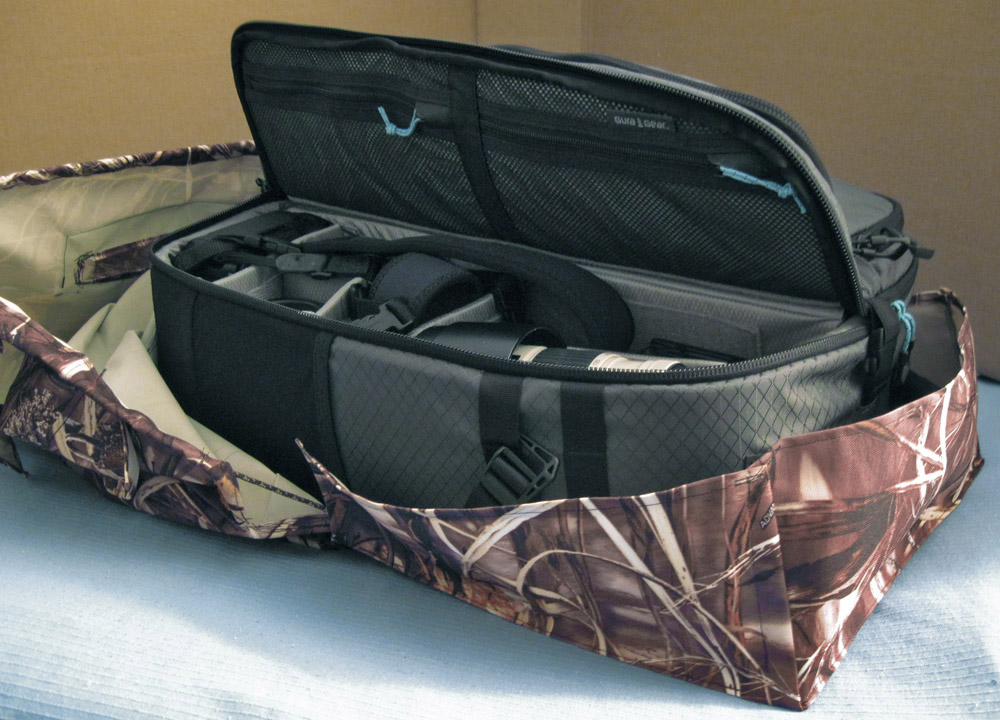
The left
photo shows what I came up with. I'm not going into a step-by-step
tutorial of how to make one, as it frankly wasn't that difficult
a project, and a measured pattern for my backpack would likely
not fit others. I will however try to generally explain my process
so it can be adapted to your needs..
My first
concern was "What if I had to set down my backpack in shallow
water (water puddle) or on really damp, soggy ground?" After
testing the material to be certain it was actually waterproof
(and not just water-resistant) I decided to make the "base"
of the cover without any seams or stitching, since I had no
waterproofing tape to cover stitches. I achieved this by using
a single rectangle of material, folding up the sides and pleating
the corners so it essentially made an open top "box". A diagram
at right shows how this was accomplished. The only stitching,
and therefore needle holes, are at the top edge where I rolled
over the edge to make a neat hem and lock in the corner pleat
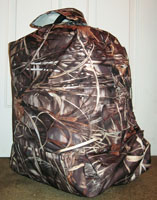
folds. That gave me six inches height with no holes of any kind.
This "rectangular bowl" should work well to keep the pack dry even if set in water up to 4 or 5 inches deep.
Next I fashioned
a "hood"
with a drawstring. This covers the top and three sides (exactly
like a rain jacket hood on your head), leaving the back open
for the harness and hip belt. Then this "hood" was sewn to the
"box" base as
in this diagram.
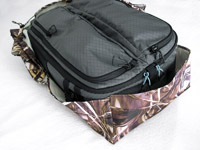
At this
point I took time to mark and cut out openings for (1) the top
and side handles, (2) for accessing the side pockets and (3)
for accessing the tripod attachment straps. Such holes tend
to defeat the rainproofing concept, so I made flaps from the
same material and sewed each of them on along one edge so they
could flip up to access the handles, etc., and flop down to
cover them.
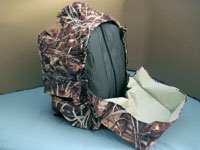
The only
thing missing now was a way to lay the pack down on its back
to access my gear without getting the harness and hip belt muddy.
For this I made another "hood" shaped cover for the
harness side of the pack. This "harness hood" is very
simple - no draw string needed. It's just like the main hood
but without a drawstring edge folded over as
in this diagram. You can make it out of one single piece
of material like the main hood, or by sewing together three
side strips and a rectangular back. This is not designed
to lay in water puddles since it has stitching. Once this is
made, it is simply sewn along one edge to attach it to the "bottom
box" of the main cover. When wearing the backpack, it simply
rolls up and stuffs inside the bottom of the pack cover out
of the way of the harness.
 |

|

|

|
 |
Harness hood opened
(harness and hip belt
stored under cover ) |
Main hood pulled back with
pack sitting on harness
hood in working position |
Rain
cover over top
cutout is pulled back to
show
carrying
handle |
Rain
flaps over side
cutouts
are pulled up to show side
handle & tripod strap access |
I
used "bow" style cordlocks, but springloaded push button
cordlocks work as well |

|

|
Harness
hood
tucked in for
full
weather protection |
Harness
out but tucked
into bottom "box"
(harness hood folded in) |
|
Pack
lying on harness
hood
ready to
access gear |
These photos with explanations, along with the provided
diagrams above, should make everything clear enough to follow and
create your own backpack cover.
All in all
it's a relatively simple bit of cutting and sewing. The cover
does not have to fit tightly. It only has to draw up enough
with the draw string so it will stay on. Mine is cut full enough
that the add-on "utility pocket" featured in this
project fits under it easily. The openings I cut out provide
access to the carry handles, to insert a tripod and strap it
on, and to reach the side pockets easily. Now my gray city slicker,
luggage look, regulation airplane carry-on bag is ready for
some real work in the boonies. It will blend in with all my
other gear, and myself, and be protected from the muck and wet
of the great outdoors.
|
|
 |
|
 |