|
|
|
|

Manfrotto 685B NeoTec Monopod Foot Safety Cable
|
Photographers
have reported loosing the rubber base foot from their
685B monopod. I had heard similar stories of loosing the
rubber grip from the 393 gimbal head, but while knowing
of this I took no safety measures other than to keep an
eye on mine. It didn't help. The grip disappeared one
day despite my vigilance. Lesson learned, the hard
way. I resolved not to let it happen with my monopod.
Though
the foot is a very snug fit, it will come off if you tug
on it with enough force. One report mentioned the lost
foot was "plastic", although the foot on my monopod was
definetly rubber. Possibly Manfrotto realized the plastic
foot was too easily lost and changed to a rubber foot
in later production, or the report could be mistaken.
In any event, I decided to take no chances.
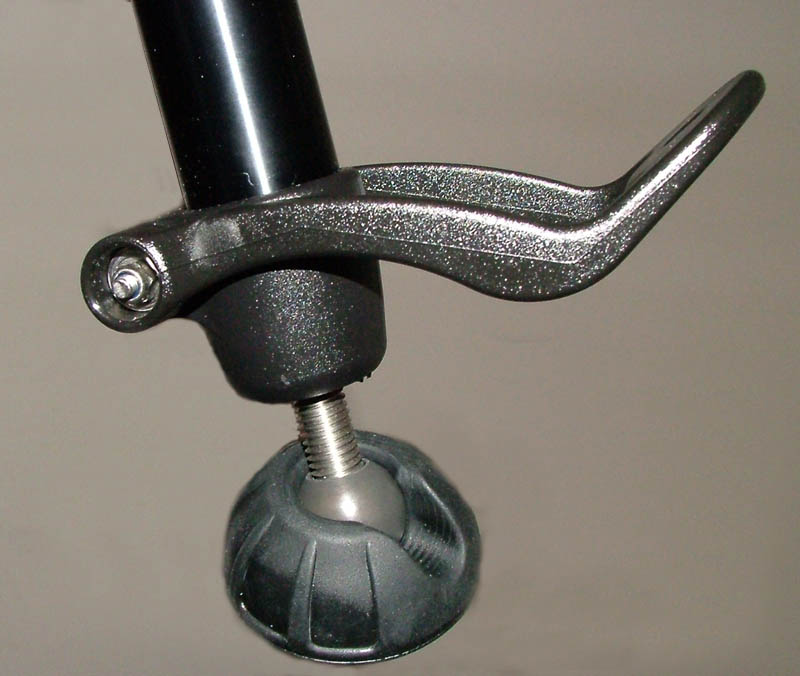
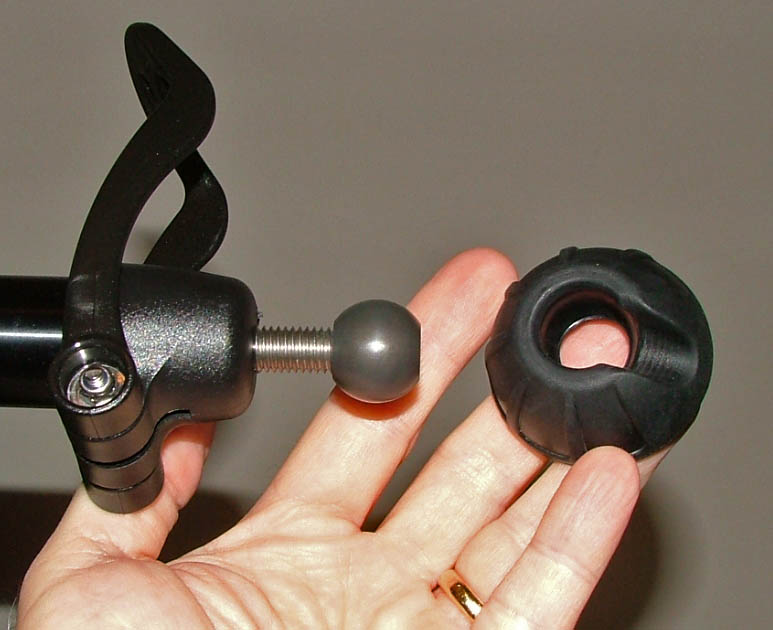
The
left photos shows the foot snapped on the ball that screws
up and down to expose the spike. The right shows the ball
with the foot pulled off.
What
You Will Need for this project:
a drill and small drill bit
pliers
side cutters
crimping tool is optional (pliers can be used)
screwdriver or driver bit for drill
a 1 inch or 1-1/4 inch # 8 wood screw (small washer
optional)
a short length of 1/8 or 3/32 stainless cable (6 inches
is more than enough)
two crimp-on eyehooks for electronics wire or small
crimp style wire connectors
In
the photo at right I show several kinds of crimpable wire
eyehooks I had on hand. You may find other types of crimp-on
wire or cable clamps. Once you see how I use these, you
can better decide whether the style of crimp you have
available will do the job.
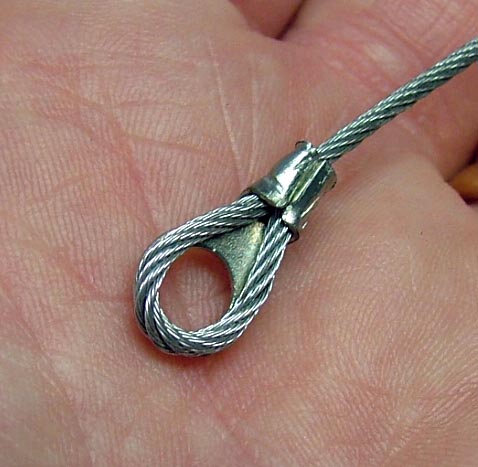
A
loop of the cable
I used is shown at left. It can be bought by the
foot. Look in the hardware store in the chain and rope
section. Among other things, I use it to suspend bird
feeders since the squirrels cannot chew this in two, and
it won't rust. It's tougher than nails, almost impossible
to cut, cannot be broken, yet it's extremely flexible.
It is the strength and flexibility you need here, and
the stainless factor will avoid any rust or corrosion
as well. You might accomplish this project with some sort
of heavy duty polyester line like fishing line, and it
will be easier to cut than the cable. But that means it
could be damaged in use more easily as well.
Step One - Remove the rubber
foot and drill a small horizontal hole in it opposite
the shaft notch or indent. This
photo will show where to orient the hole. Do
not drill too close to the inside of the foot where the
ball rubs. As you can see, a screw will go here, and
you don't want the threads chewing up the ball or binding
it from free movement. Drilling rubber is very different
from drilling most anything else. The rubber stretches
around the drill bit and doesn't really drill out much
of a hole, but it is necessary to have at least this guide
hole for the screw. You may notice how well the rubber
grabs the drill bit. You can imagine how tightly the screw
will hold when done.
Step Two - Prepare one of
the eyehook clamps as shown
at left. The extra eyehook is shown only so you
can see what is hidden by the cable in the photo. Next,
pull the cable into a tight loop to match the eyehook
hole as shown in the photo
at lower left, then crimp it tightly. You don't
want the end to come out. It will be a bear to get back
in. Try to keep the cut end of the cable just inside the
clamp to avoid being scratched, or having the cable end
catch on clothing. The cable strands are very tiny, fine
and sharp. If there is anything for it to snag on or scratch,
it will find it.
Step Three - Prepare the
loop for the other end of the cable as shown in the upper
right photo. To make the clamp, I cut off the
eyehook portion and just used the crimp shank alone. Once
the loop is fed through, slip it over the threaded spike
and ball while the rubber foot is still removed as shown
at
right. Slide the crimp and loop until you have
a total reach of about 2-1/2 inches from loop end to loop
end. Make the loop small enough so it will not slip off
over the ball, but loose enough so it will easily spin
around the spike shaft threads when you screw the ball
and foot in or out to expose the spike end. It would even
be a good idea to snap the foot on over the ball at this
point and be sure the small cable loop and eyehook will
easily reach the screw hole drilled into the foot. Be
sure you have some slack there so the foot will tilt up
into the shaft indent in the foot.
While
carefully holding the crimp in position, crimp it tightly.
Then cut off the excess cable, being sure you do not nick
or damage the strands in the piece of cable that stays.
Cutting will be a chore because the cable is so flexible
and tough. You will have to work at it with the side cutters,
squeezing and wiggling side to side, then snipping at
it a couple of strands at a time until you've managed
to cut it through. Cut it as close to the crimp as possible.
As I noted earlier, any strand ends hanging outside the
crimp will tend to snag on clothing or skin if it gets
a chance.
Step Four - When you've cut
off the excess cable, you can then snap the foot onto
the ball and attach it with the screw as shown in the
left
photo. In the event you used a cable clamp without
the eyehook end, you will very likely need a small washer
over the screw to insure the cable loop does not slip
off the screw head.
The
finished project is shown
at right. If you wish, you can touch up the cable
and screw with a small brush and some black paint to make
it less visible. With this security cable installed, you
should never need to worry about the foot coming off and
getting lost. |
| |
|
|
 |
|
 |