|
|
|

The
Eyes Have It
That all-important "spark" in wildlife
photography
|

|
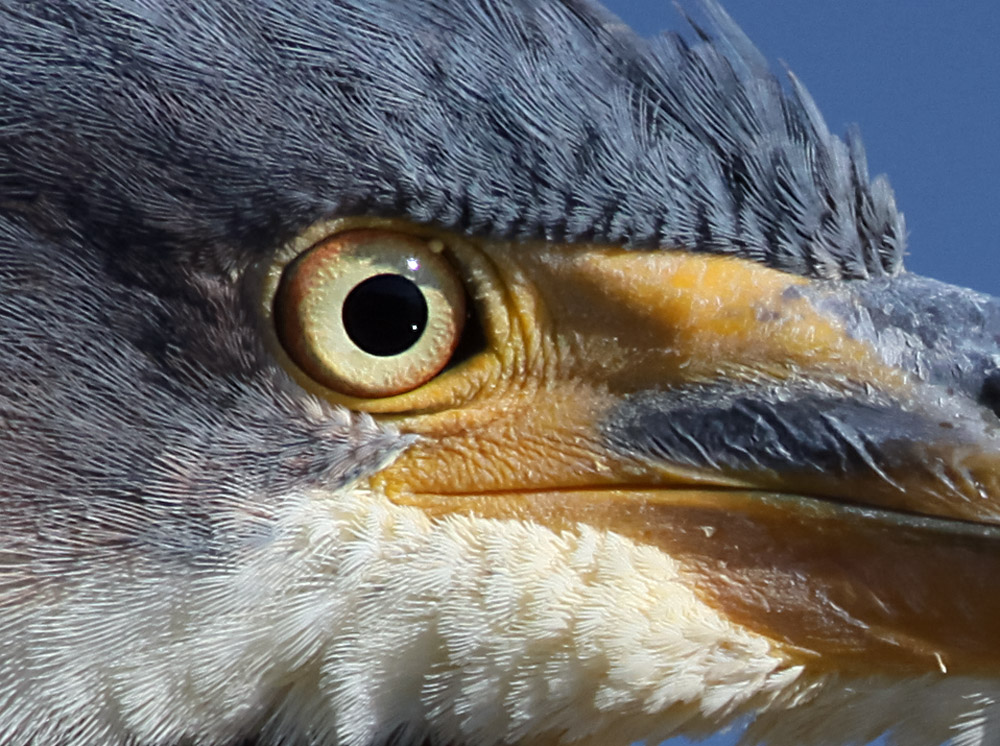
Most
experienced wildlife photographers already know the importance
of "eye contact" when capturing wildlife photos, but it's a
subject seldom talked about. Too many aspiring wildlife photographers
seem unaware of the issue. I know I certainly was when starting
out. It's understandable, since there is already a myriad of
issues to keep track of when you're just beginning...... focus,
exposure, framing and composition, learning the in's and out's
of your camera and lens features, buttons, settings..... the
list goes on and on. A small detail like the eyes of your subject
may seem relatively unimportant compared to . . say. . . getting
the exposure right. But the fact remains that getting the eyes
right is, in the final analysis, just as important, if not more
so. The most well-composed, perfectly exposed, once-in-a-lifetime
action shot can be ruined if the subject's eye is blank, not
visible, closed or out of focus compared to the rest of the
scene. While this issue is mostly avoidable by using good practices,
sometimes it is simply unavoidable. I will outline what can
go wrong, and offer ideas on how to avoid it for the most part.
For those times when it's unavoidable, I will offer ideas on
how to fix the problem.
There are
several ways this problem can manifest itself, but each has
a means to either avoid the problem in the first place, or to
fix the problem after-the-fact. Though all my examples here
are birds, this issue and it's fixes are the same no matter
what you're photographing. Whether it's elephants, tigers, hunting
dogs, the pet cat, horses, antelope, birds, frogs or wolves,
the importance of eye contact and how to get it right is the
same. Also note, my software adjustment instructions here are
referencing Adobe Photoshop tools and terminology. If you use
other software, your tool and function names may differ. Hopefully
you can make the connection so you can do these adjustments
with your chosen graphics or editing software.
|
 |
 |
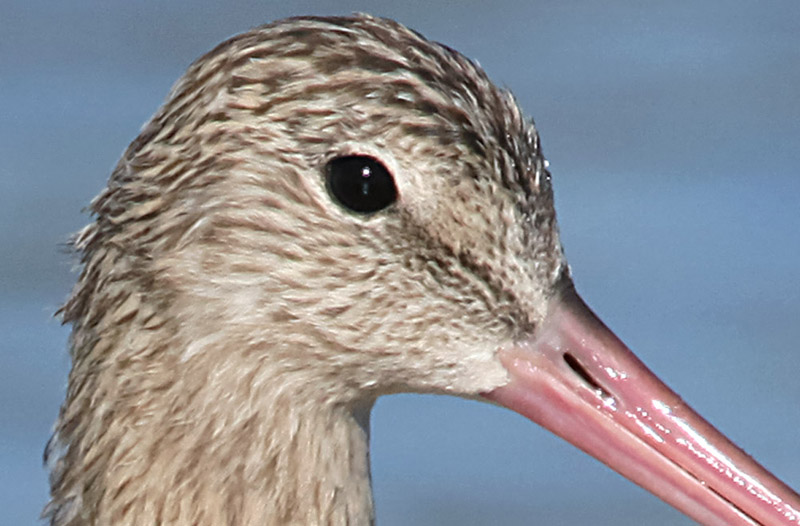
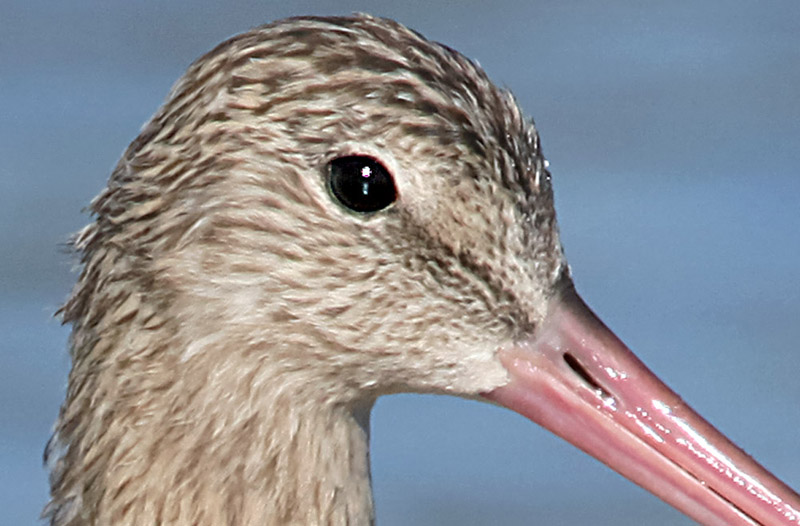
Shadowed
Eye from backlighting
and slight underexposure |
Photoshop
"shadow / highlight"
& "levels" adjustments can help |
Additional
improvement with
selective "levels" & "unsharp
mask" adjustments to the eye |
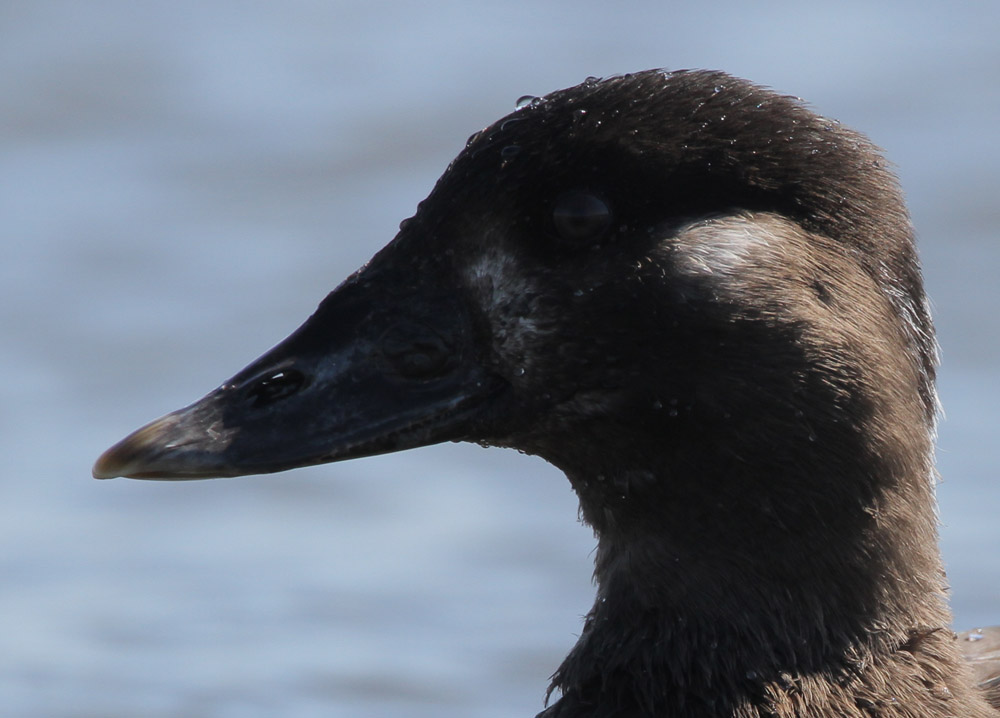
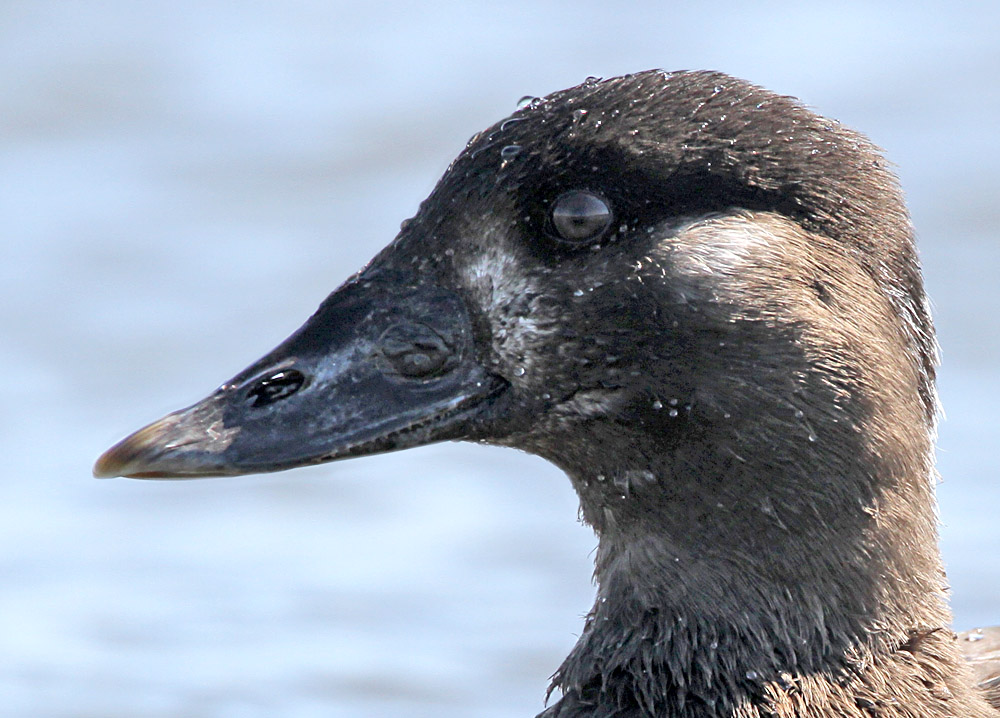
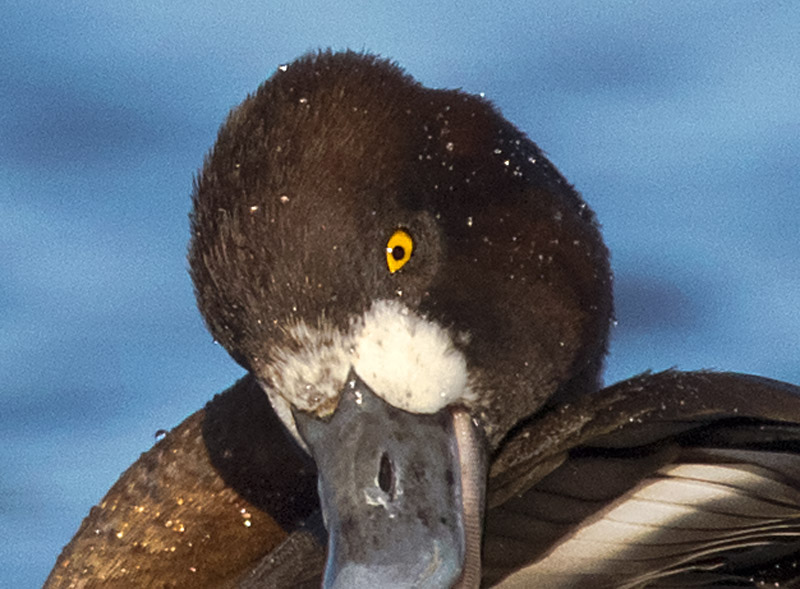
Hidden Eye and Shadowed
Eye - These are easily identifiable by the name.
If the subject's head is turned so that the eyes are not even
visible, there is nothing you can do except don't take the
shot to begin with. Wait until the animal turns it's head
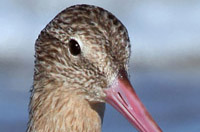
for a good pose where the eye is visible. Shadowed Eye
comes about by having a bad angle of lighting that puts the
eye in shadow. This can be a cast shadow from another object
or the shadow from the subject's head when turned away from
the light. Wait out the subject until it turns its head so light
hits the eye, or until it moves so it is no longer under the
shadow of a nearby object. Frankly, it's just common sense .
. .but being aware of the issue is key here. If you're not paying
attention to it . . . too busy fussing with focus or exposure
. . . and don't notice, it'll bite you.
|
| Scoter
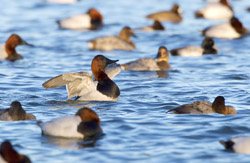
hen eye in good light |
Both these
issues are avoided the same way. You have to "see"
what you're looking at, and have the presence of mind to realize
there is a problem before shooting. Wait until you can see the
eye and have good light on it. . . . then take the shot.
You can
often salvage a shot with Shadowed
Eye with some software adjustments, especially when the
image actually has some detail in the eye you can work with,
like the hen Scoter duck examples above. Brightening the shadowed
areas in Photoshop with the "shadow / highlight" controls
can help, as seen on the
middle example. Additionally, by isolating the eye with
the "eliptical marquee tool" or "lasso tool", you can apply
some selective
adjustments to the eye alone to further improve the contrast
and detail in the eye. But don't overdo this (more on that later).
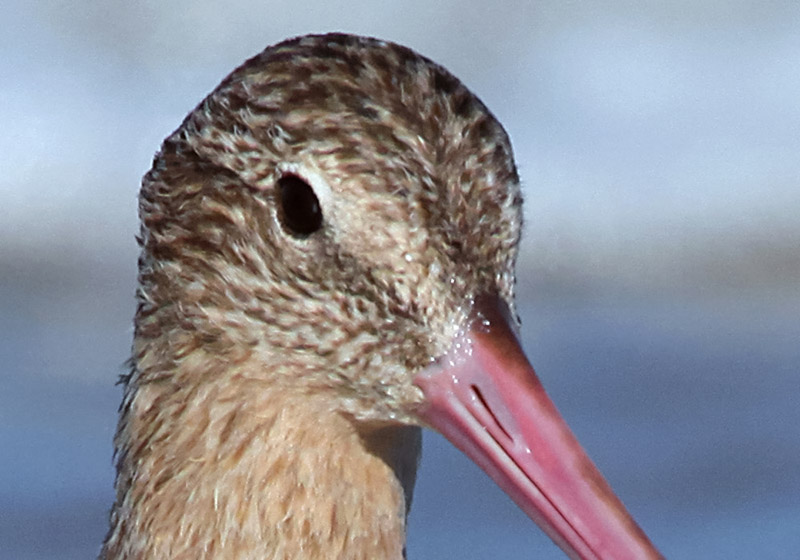
Dead Eye - You might call
this "zombie eye" because there seems to be no life in the eye
at all. Some animals have eyes so dark they are virtually solid
black, and no amount of sun or fill flash will bring out any
detail. With Dead Eye, even if there is light hitting
it, the most you can hope for is a glint on the eyeball called
a "catch light". You can mostly avoid Dead Eye by, again, being
vigilant when shooting, watching for that glint of light in
the eye, and shoot only when you see it there . . . or . . .
by skillful use of fill flash. If you have otherwise good shots,
but there is no "catch light" at all, it usually can be added
with software. Use a tiny soft-edged brush point and
put a tiny dot of white on the eye. This is tricky, because
it can look really fake if not done well. I recommend
studying your photos that have a good "catch light" to see the
size and location of a real natural "catch light" which you
can mimic for best results.

|
 |
 |
 |
 |
Dead
Eye on a
Marbled Godwit |
Dead
Eye carefully
fixed in Photoshop |
Dead
Eye fix done incorrectly -
too big & wrong position |
A
slight turn of the head
provides a natural catch light |
Selective
adjustment in Photoshop
accentuates the catch light |
In the first
Marbled Godwit example above, the face has plenty of light,
but the eye is not at an angle to catch the sun directly, resulting
in a
lifeless black hole. Skillful addition
of a white dot in the correct location with a tiny soft-edged
brush in Photoshop fixes this problem in the second example
above. The third example shows how
NOT to do it. If the fix is done wrong, it LOOKS wrong.
In example four, just a slight turn of the head produces a
natural catch light, which can be accentuated with a
little selective adjustment (only to the eyeball). Adding
some contrast with "levels" controls works well. In
this instance, also using a little "unsharp mask"
accentuated the catch light even more.
 |
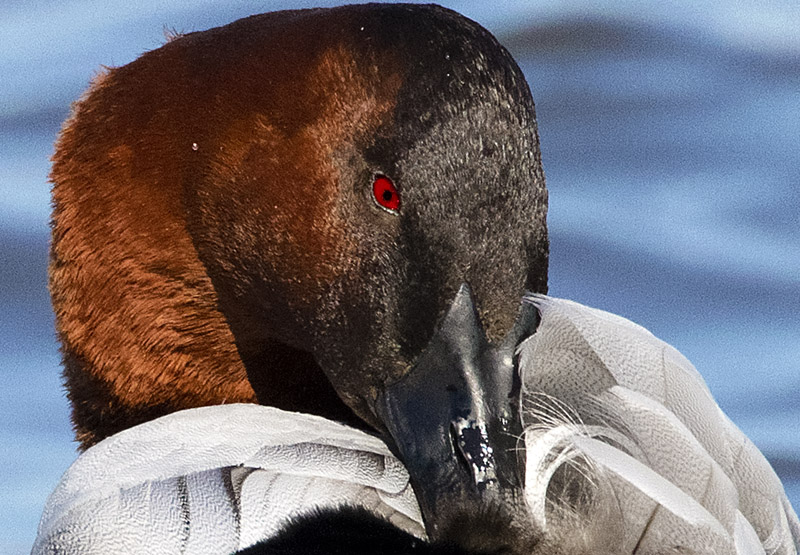
 |
Nictitating
membrane visible
on a drake Canvasback |
Same
Canvasback with
beautiful red eye visible |
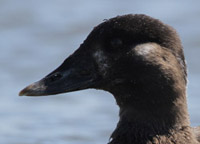
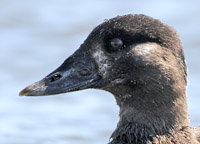
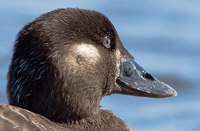
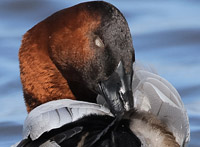
Ghost Eye (Nictitating membrane)
- In the case of birds, sharks, some mammals and some
reptiles, there is a "third" eyelid called a "nictitating
membrane" (see
Wikipedia) which protects and lubricates the eye. When this
membrane flicks into action, it can
cover the eye with a semi-translucent skin. It is very often
seen in birds while preening, as in the first example at right
of a drake Canvasback preening. I avoid shooting these whenever
I can tell the eye is covered. But often in a series of rapid-fire
shots, one or more of them captures the membrane over the eye
while the rest are fine, as in this shot of the very same Canvasback
caught with its brilliant
red eye visible. It's obvious which shot in this set would
be used. But, if you had this issue, and for whatever reason
the shot with the covered eye was otherwise the best image,
what could you do to fix it?
 |
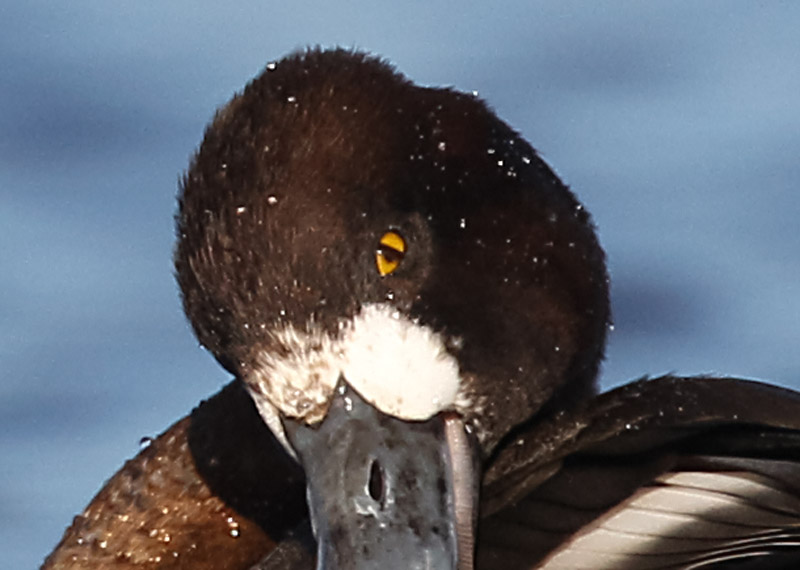
 |
Original
unprocessed image shows
dark band on membrane |
The
processed image with
dark band retouched |
In the examples
at right, luckily one of them is an almost identical image with
a good eye. It is possible in Photoshop to either copy and paste,
or copy with the "clone tool" a good eye from one image to the
other, replacing the bad eye. Obviously it must be correctly
sized, and be at the correct angle to match, or it would look
odd indeed.
There is
another type of nictitating membrane which is almost completely
transparent, but has a dark band along the edge. This hen Scaup
photo captures
the membrane as it passes half way across the eye, showing
the dark band. These can be fixed by using a very small "clone
tool" and carefully copying
some of the pupil color area over the dark band. Again,
this must be done carefully. A sloppy job will look odd and
attract attention.
The important
thing to remember is to pay attention to these issues when shooting,
and when processing your images. Mastering such details
will improve your images, and help you be more observant and
thoughtful while shooting. Eventually you won't even have to
think about it, and you will gain the confidence to deal with
it effectively.

|
 |
 |
An
otherwise sharp,
detailed eye
is hard to see
against dark
feathers in the original photo |
Select
the pupil and make "levels"
adjustments
so it is
easier
to see in the edited photo |
Overadjustment
will make
the eye look unnatural |
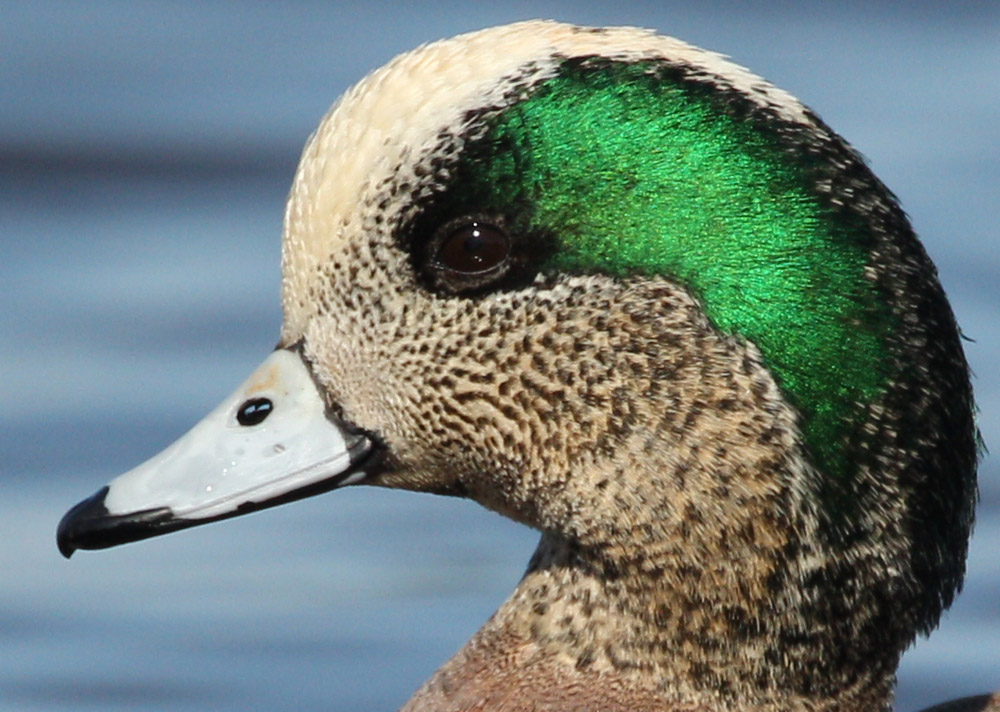
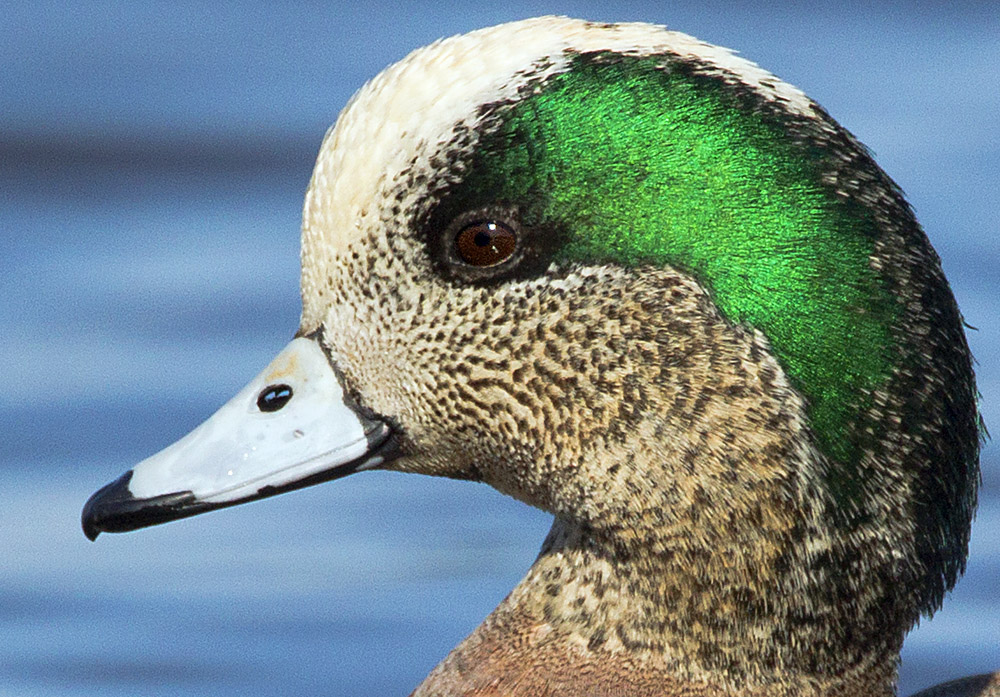
Even a good eye sometimes needs improvement
- Making eyes better is not limited to fixing problem images.
Take the first
sample image at the right of the American Wigeon drake as
an example. The eye is visible, has a nice catch light, is sharply
in focus, and has good detail. The only problem is that it's
such a deep brown, it doesn't show up well against the surrounding
dark feathers. It's not that you did anything wrong in taking
the photo. The light source was coming from overhead, and did
not illuminate the pupil very well. In cases like this a little
selective touch-up can make the eye easier to see, and add appeal
to the image.
While doing
your usual image processing, cropping, etc., select just the
pupil with the "eliptical marquee tool" or "lasso tool"
in Photoshop and adjust the "levels" sliders so the pupil is
brightened just a little, while also increasing the contrast,
just a little as well. The middle
image at right shows the improvement. However, it is easy
to overdo such adjustments if you're not careful, as in
the far right example. If it does not look natural, it will
detract from the image instead of enhancing it.
|
| This is a test image |
This is a test. It is only a test.
Not every
image is a close-up where details and catch lights are visible
in the eyes. But that doesn't mean the eye is less important
. . . it means the eye is even more important. Try this
test. There is a thumbnail on the far right. Before clicking
the thumbnail and looking at the image, I want you to be aware
of, and consciously think about, what you do when the image
comes up. Okay, now click on the thumbnail and view the image,
then come back.
Okay, now
what did you do? Think about it. I'm betting that your eye went
DIRECTLY to the eye on the duck and stared at it. Did you notice
it is the ONLY eye in the photo? All the rest of those ducks'
eyes were either hidden by a turned head, or so far out of focus
they were indistinguishable. That single, sharp, crisp point
. . . the eye . . . immediately grabbed your attention and held
it. Even if you tried to look away at the other objects in the photo, it kept pulling you back.
Go ahead
and try it again. See if you can look at the rest of the image
without coming back to that one eye. The number of pixels in
that eye is a tiny fraction of all the pixels in the whole photo,
yet they have the power to draw you in and hold your attention.
That is the power of the eye. That is why it is so important
to insure the eyes on your photography subjects are in focus
and as detailed and interesting as you can make them.

|
 |
 |
Completely unadjusted
original image |
Same image with no adjustments
except sharpening the eyes |
The rest of the
image adjusted |
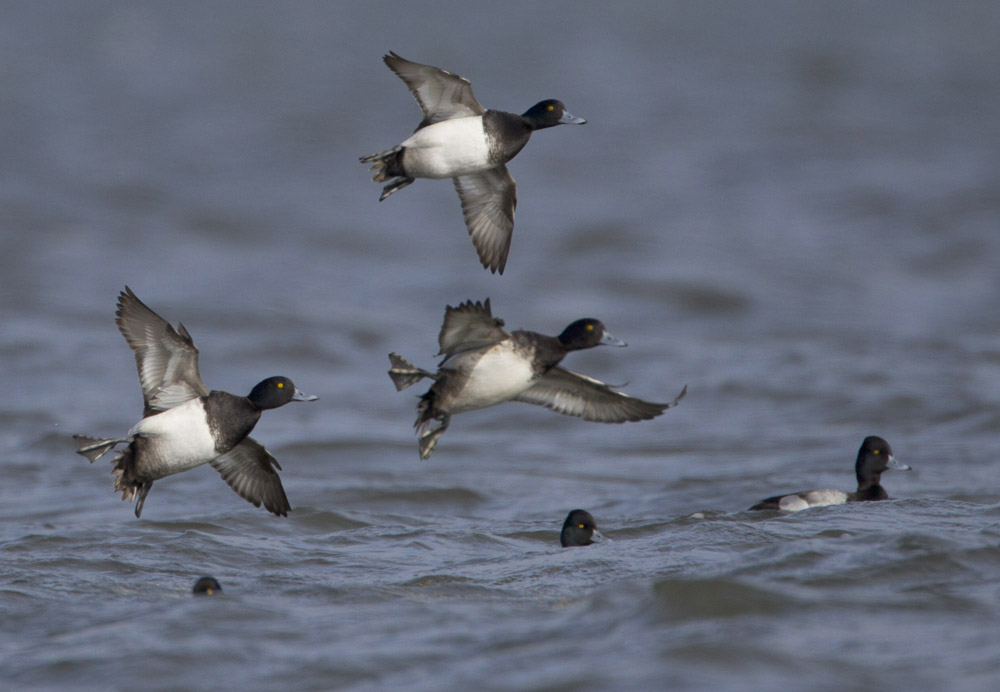
Check out
the first flying duck image at right. The far left duck is in
best focus. The top duck is next best in focus, while the central
duck is noticeably least in focus. The eyes on these ducks clearly
show this to be true, each slightly fuzzier than the previous.
But in the second image the left and top ducks' eyes have been
individually sharpened by selecting them with the "eliptical
marque tool" and applying an equal "unsharp mask"
adjustment. The least in focus central duck had its eye replaced
from the left duck with the "clone tool". With no
other adjustments at all but sharper eyes, the brain is fooled
into thinking the ducks are in better focus than they really
are. In the third image, applying post processing to the rest
of the image improves it greatly, but having the eyes sharp
and clear is the most important adjustment.
|
|
 |
|
 |